How to Fold a 3D Origami Treat Box with Bow (Easy DIY Paper Gift Basket)
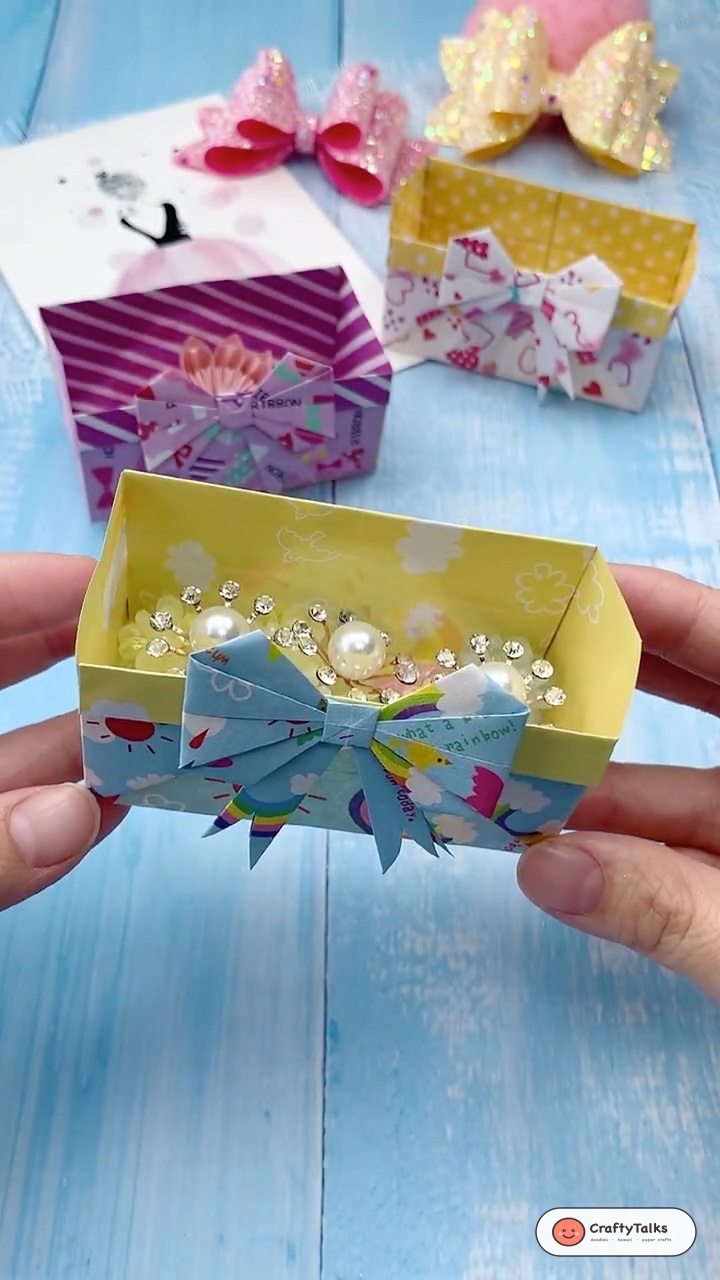
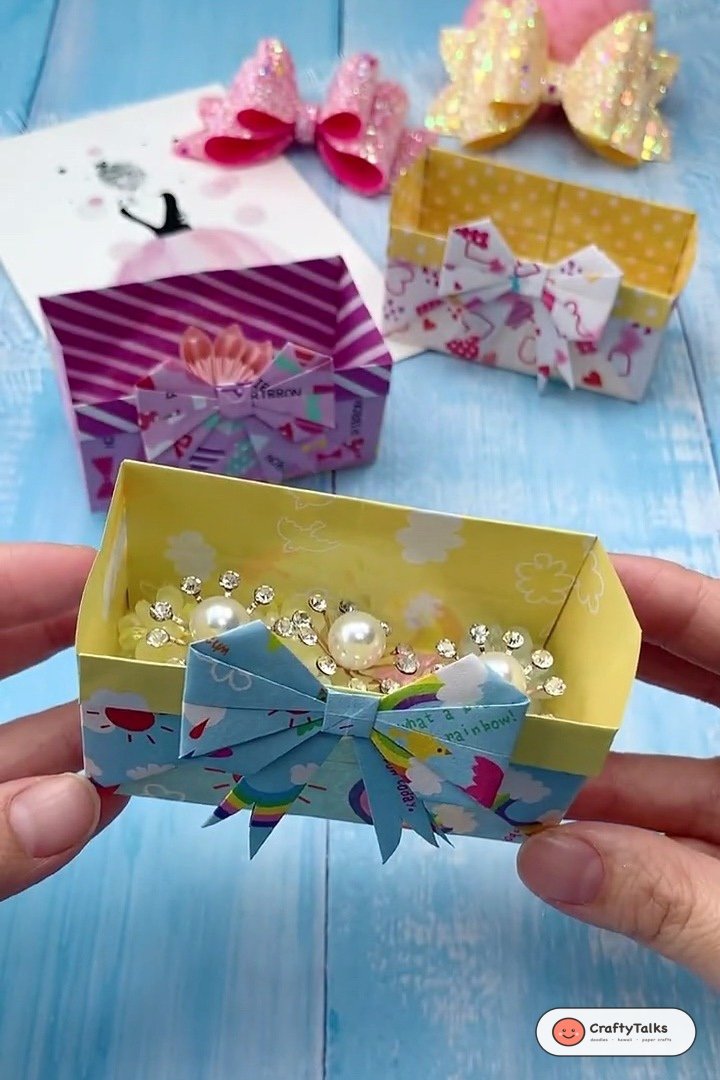
Learn how to fold a 3D origami treat box with bow in 6 easy, step-by-step paper folding stages. This open rectangular paper basket features contrasting rim cuffs and a matching folded origami bow ribbon along the front edge. It makes a charming tabletop container for wrapped candies, small accessories, hair clips, or party favors. Follow along with our video demonstration and step-by-step photo guide below.
Watch the Step-by-Step Video Tutorial 🎥
8 to 10 Minutes
Beginner Friendly
15 x 15 cm Square
Candy, Jewelry & Favors
Materials and Tools Needed
- Origami Paper: 1 square sheet of double-sided patterned paper (15 x 15 cm or 20 x 20 cm). Double-sided paper gives you a contrasting interior lining and border cuff.
- Paper Scrap for Bow: A matching rectangular scrap (approx. 5 x 8 cm) or a pre-folded origami bow.
- Craft Glue or Double-Sided Tape: A tiny dab to secure the paper bow ribbon to the front cuff.
- Bone Folder or Ruler: Helpful for pressing crisp, clean creases along each fold line.
Step-by-Step Folding Instructions
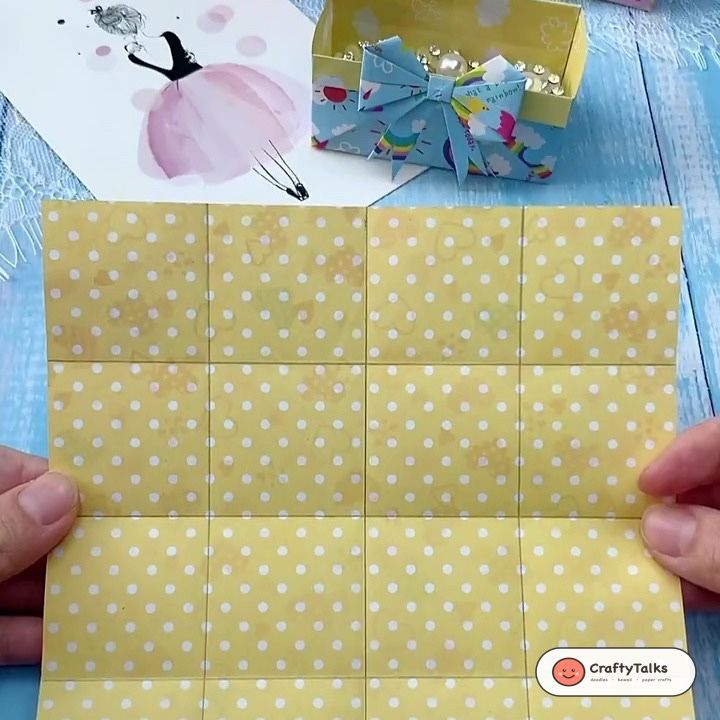
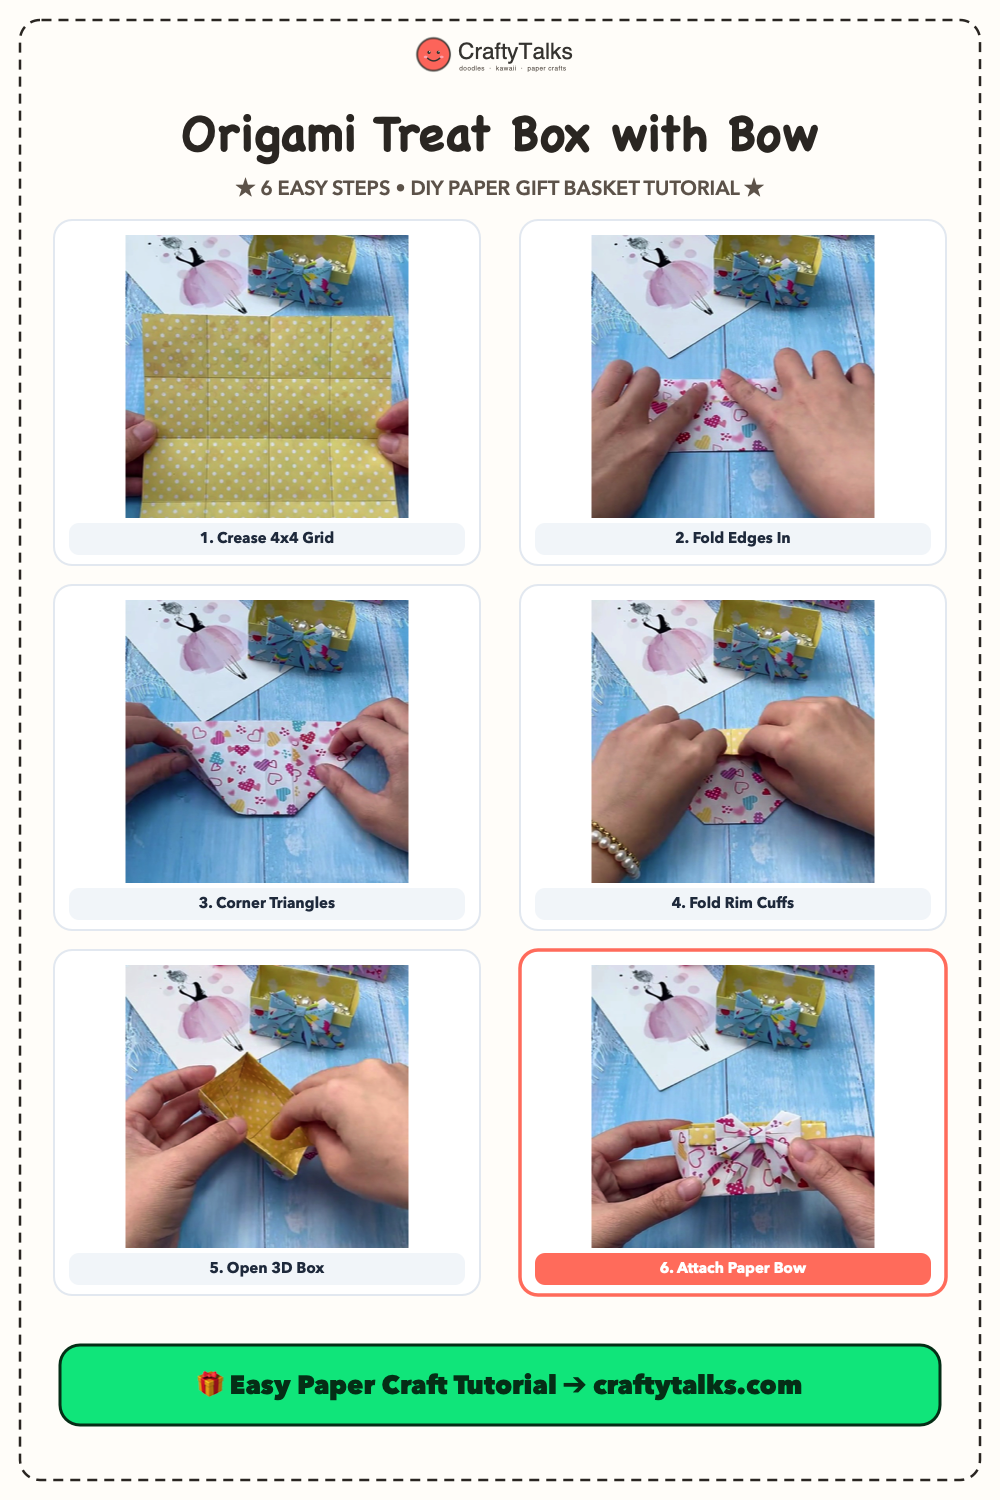
Step 1: Crease a 4×4 Grid on Square Origami Paper
Lay your square origami sheet flat on your work surface. Fold the sheet in half horizontally and crease firmly, then unfold. Fold in half vertically and unfold. Next, fold each of the four outer edges inward to meet the center fold lines and unfold. You will have a crisp grid of sixteen equal squares that act as reference guides for every subsequent fold.
💡 Craft Tip: Running a bone folder or clean thumbnail along each crease ensures sharp edges when shaping the box walls later.
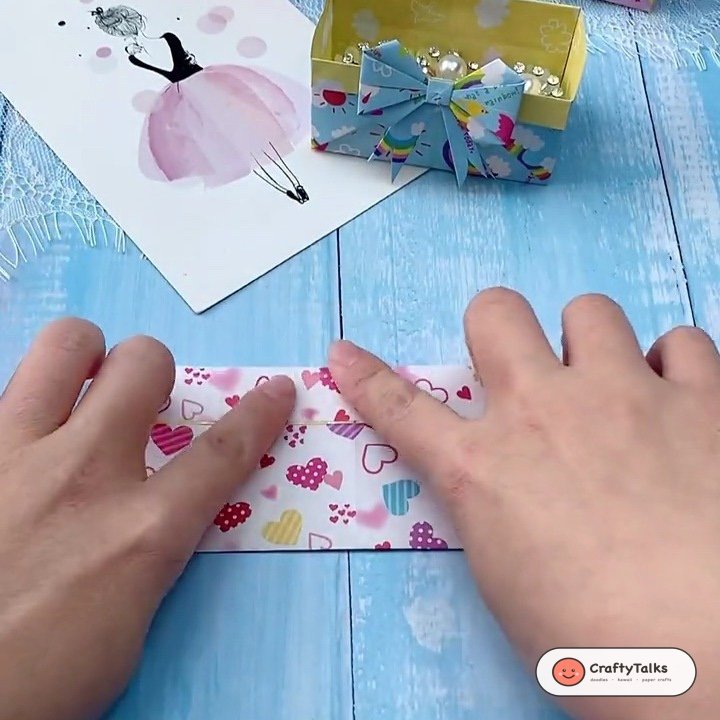
Step 2: Fold the Top and Bottom Quarters Inward
Flip your paper over so the decorative pattern faces upward. Fold the top horizontal row and the bottom horizontal row inward toward the center along the grid crease lines. Press both folded panels flat against the table.
💡 Craft Tip: Keep the edges aligned with the pre-creased grid lines so the basket sides remain straight and symmetrical.
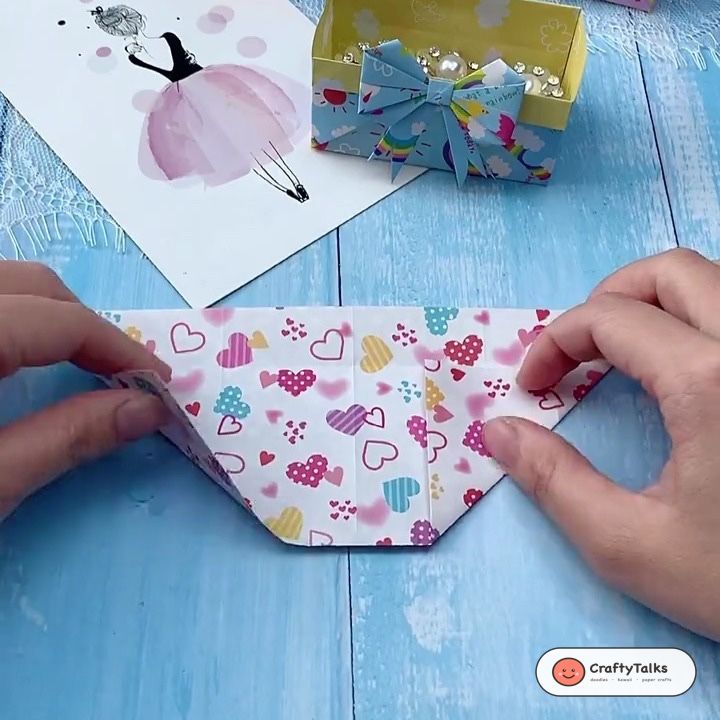
Step 3: Fold Corner Triangles to Shape the Base
Fold the lower left and right corners upward diagonally along the crease lines, creating two symmetrical triangular tucks. This step tapers the lower portion of the sheet and forms the sturdy angled corners of your basket floor.
💡 Craft Tip: Crease each diagonal triangle firmly so the corners lock cleanly into place.
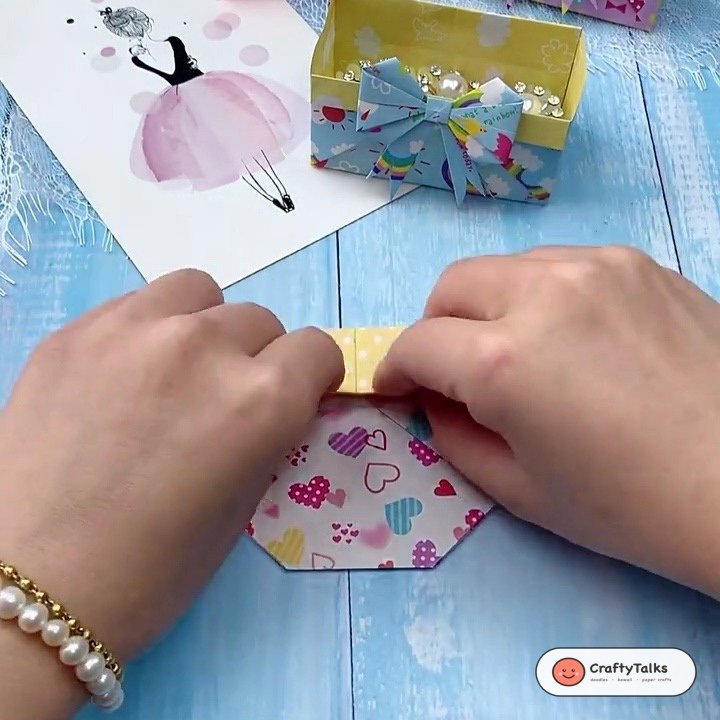
Step 4: Fold the Top Rim Flaps into Contrasting Cuffs
Take the upper horizontal flaps and fold them down over the outer edge of the basket. If using double-sided paper with contrasting patterns, this fold reveals the interior color as a neat border cuff along the rim.
💡 Craft Tip: Folding the rim cuffs firmly locks the side layers together without needing tape.
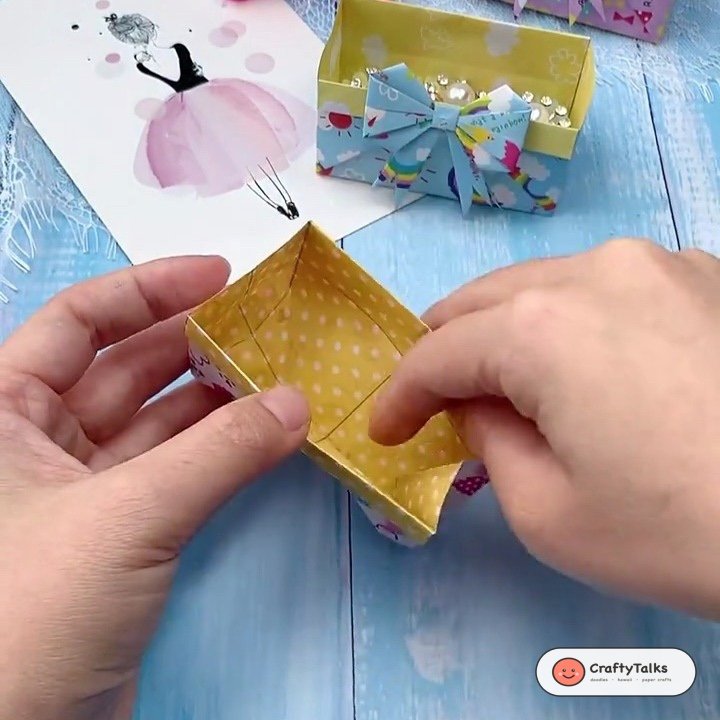
Step 5: Open the 3D Interior and Form Box Walls
Gently slip your fingers between the front and back panels. Spread the side walls apart while pressing the rectangular floor flat from the inside. Pinch the four vertical corner creases with your fingertips to square off the rectangular basket shape.
💡 Craft Tip: Press firmly along the perimeter of the base so your box sits flat on tables without tipping.
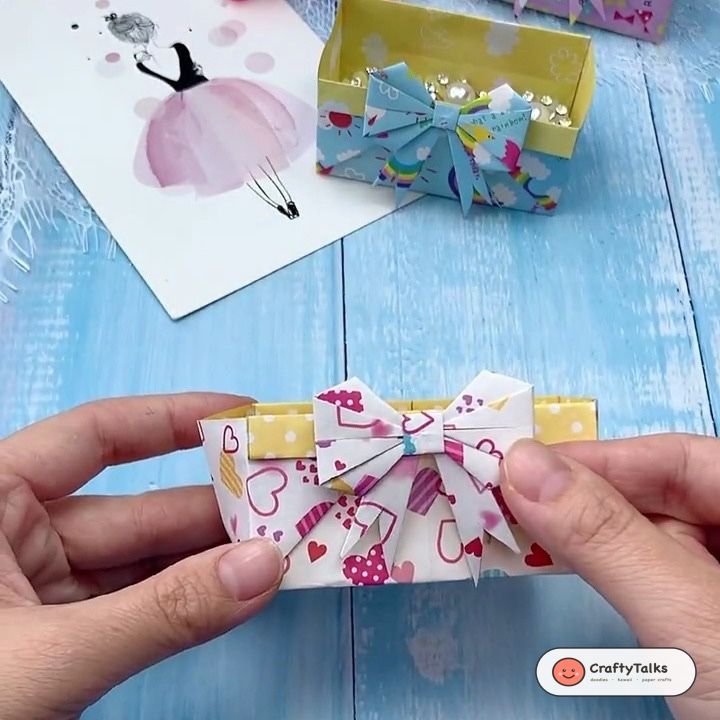
Step 6: Attach the Matching Folded Origami Bow
Take a small matching paper bow folded from coordinating paper scrap. Apply a dab of craft glue to the back of the bow knot and press it firmly onto the center of the front cuff. Hold for ten seconds until the adhesive sets.
💡 Craft Tip: For gift giving, you can add shredded crinkle paper or a tiny folded card inside the basket.
Creative Ways to Use Your Origami Treat Box
Once you fold your first treat box, you can adapt the design for different events and everyday organizing:
- Party Favor Baskets: Fill each basket with foil-wrapped chocolates, Jordan almonds, or small cookies for birthday party guests.
- Dressing Table Organizer: Use the sturdy shallow tray to hold bobby pins, rings, earrings, and hair accessories neatly on your vanity.
- Holiday Place Settings: Place a small personalized name card and holiday sweets inside each box beside dinner plates.
- Craft Room Catch-All: Keep buttons, beads, paper clips, and washi tape rolls organized across your desk.
Color and Pattern Ideas
Because the rim folds downward, double-sided papers produce striking visual accents:
- Pastel Sky & Polka Dots: Soft sky blue clouds paired with a sunny yellow polka dot interior create a cheerful springtime look.
- Festive Holiday Red & Green: Deep crimson paper with an evergreen or gold reverse side makes a festive Christmas candy tray.
- Kraft Paper & White Lace: Brown kraft cardstock with stamped white lace motifs offers a rustic farmhouse aesthetic.
- Stripes & Florals: Alternating thin pastel stripes with dainty floral prints works well for baby showers and tea parties.
More Easy Paper Crafts to Try
If you enjoyed making this paper basket, explore these beginner-friendly origami projects:
⭐ How to Make a 3D Origami Star Ornament: Puffed lucky stars with spacer beads and silk tassels.
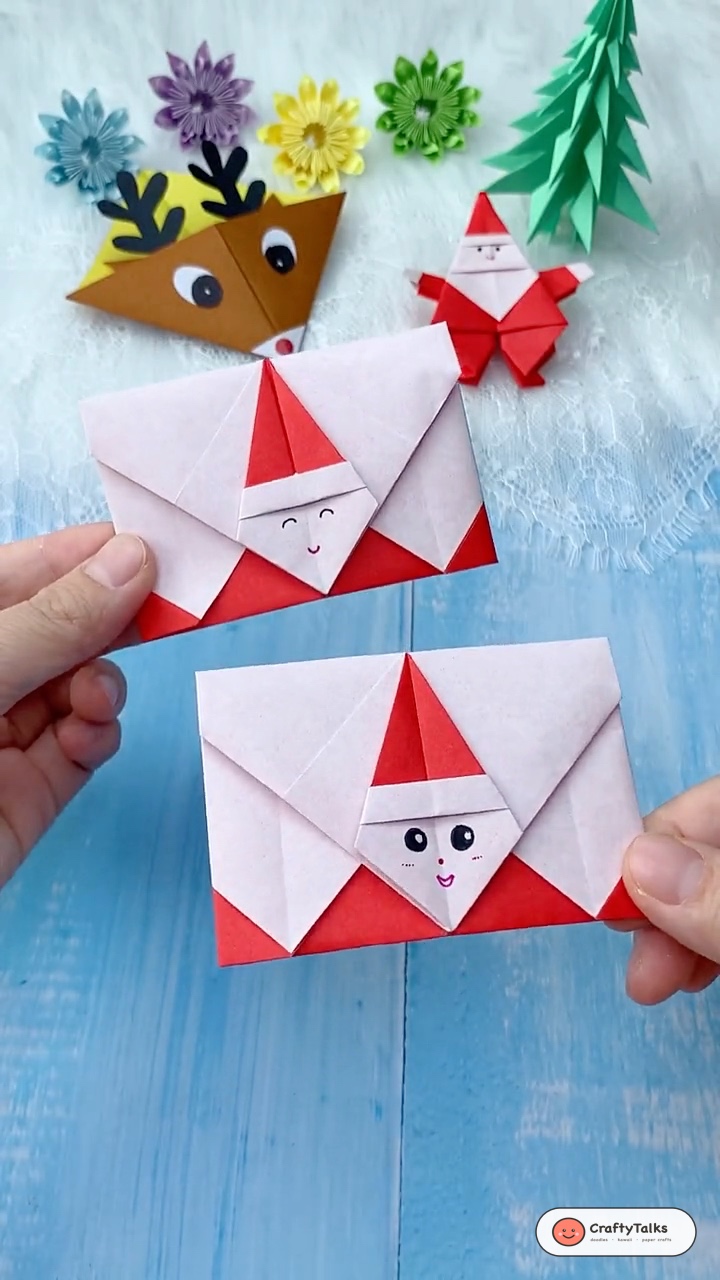
💌 How to Make an Origami Santa Envelope: Cute holiday envelope pouch for gift cards and letters.
❄️ How to Make Kirigami Paper Snowflakes: Heart-tipped folded paper window stars in 5 steps.
Frequently Asked Questions
What type of paper works best for origami boxes?
Standard origami paper (around 70 to 80 GSM) or lightweight patterned craft paper works best. Heavy cardstock can crack when making multiple layered folds, while very thin copy paper might feel too flimsy when holding treats.
Can I make this treat box in larger sizes?
Yes. Starting with a 20 x 20 cm or 30 x 30 cm square sheet yields a generous tabletop basket suitable for baked treats, mini soaps, or small gift sets. Follow the exact same 4×4 grid folding steps regardless of sheet dimensions.
How do I keep the box walls firm without glue?
The downward cuff fold locks the side flaps naturally. To make the basket extra firm, firmly crease all four perimeter base folds with a ruler or thumbnail before opening the interior.
Save This Origami Treat Box Tutorial to Pinterest
Save this visual guide to your favorite paper craft or party planning Pinterest board to fold later: