How to Fold a 3D Origami Christmas Tree (Freestanding DIY Holiday Fir Tree)
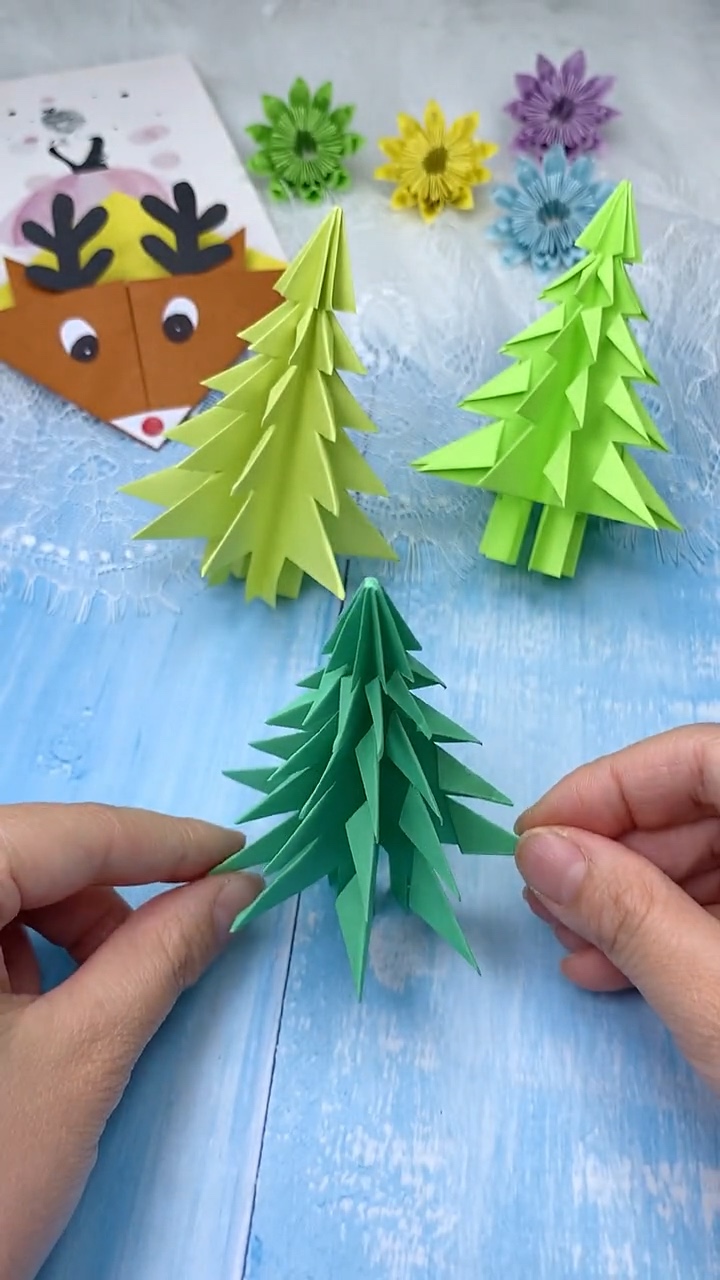
Few holiday paper crafts are as timeless and satisfying as a 3D Origami Christmas Tree! Standing proudly upright on its own folded trunk stem with multiple tiers of lush evergreen boughs, this freestanding paper fir tree turns a single flat square of paper into an enchanting geometric winter sculpture.
Unlike glue-heavy paper crafts, this design relies on traditional origami geometry combined with clever kirigami branch cuts. Starting from an eight-faceted square base, simple horizontal snips allow each evergreen branch tier to fold downward in sharp layered points. In less than ten minutes, you can fold a whole festive evergreen forest for your desk, windowsill, or holiday dinner table!
Craft Overview: At a Glance
⏱ Time Needed:
8 – 10 Minutes
🎯 Skill Level:
Beginner Friendly
📄 Recommended Paper:
1 Square (15×15 cm or 20×20 cm) Green Origami Paper
🎄 Occasion:
Tabletop Forest Decor, Holiday Mantel, Desk Tree & Place Settings
Supplies & Materials Checklist
Here is everything you will need before you begin folding and shaping:
Paper & Essentials
- 1 Sheet of Square Green Origami Paper (15×15 cm or 20×20 cm): Medium-weight paper holds crisp creases effortlessly. Double-sided green paper creates lush boughs, while white-backed paper creates a magical snow-dusted branch effect!
- Sharp Craft Scissors: For making clean, precise horizontal incisions along the tree boughs.
- Bone Folder or Ruler: Invaluable for burnishing sharp, flat creases through multiple layers of paper.
Optional Enhancements
- Gold Origami Paper Star: To glue at the very pinnacle of your tree for a crowning holiday flourish.
- Glitter Gel Pens or Sequins: To add tiny twinkling ornaments and baubles across the folded branch tips.
- Battery Tea Light: Place a tiny tea light behind your paper forest for an enchanting holiday lantern glow!
Watch the Step-by-Step Video Tutorial
Watch our real-time video demonstration below to see how each crease, squash fold, and branch notch is shaped into a standing evergreen tree:
Pro Crafter Secret: Consistent Branch Cut Depth
When snipping the branch slits in Step 5, ensure your scissor cuts stop about 4mm to 5mm before reaching the center vertical spine crease. Leaving that central spine intact ensures your tree retains its structural backbone and stands tall and proud without leaning or wobbling!
Step-by-Step How to Fold a 3D Origami Christmas Tree Tutorial
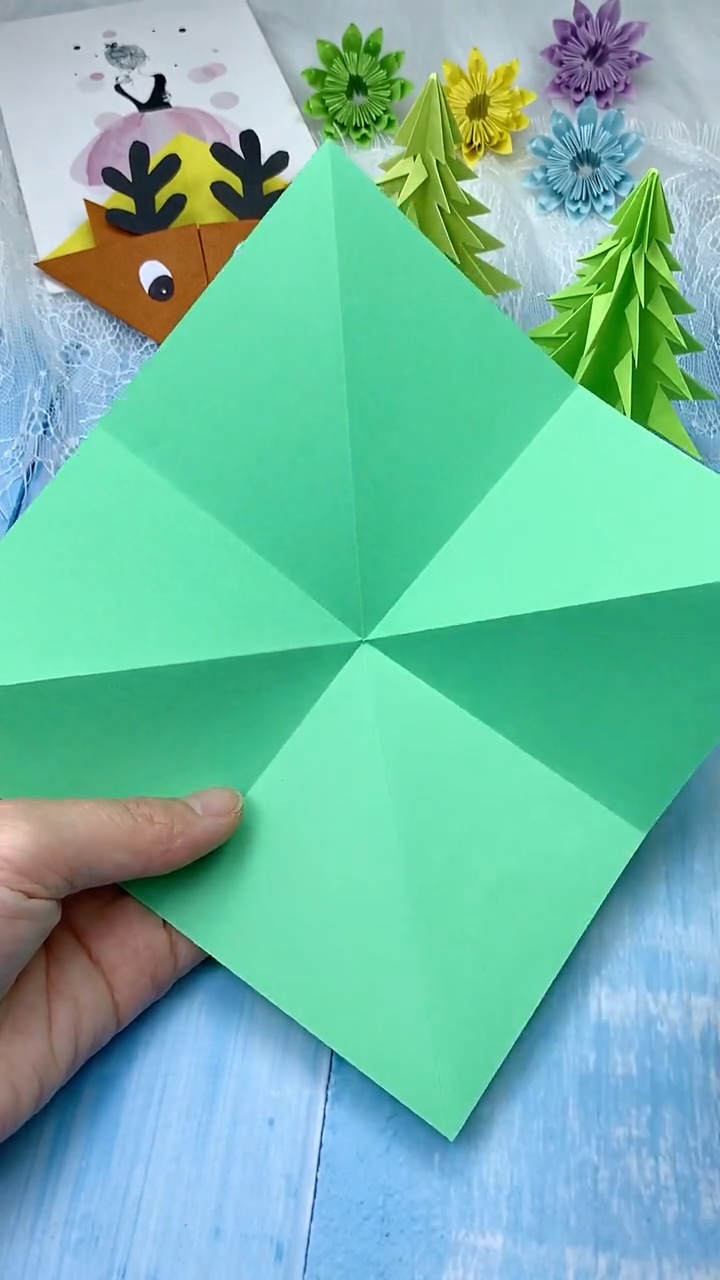
Step 1: Crease Square Paper Along Horizontal, Vertical & Diagonal Axes
Place your green origami square flat on your work surface. Fold it in half horizontally and unfold, fold in half vertically and unfold, then fold along both opposite diagonals.
These pre-creases establish a symmetrical asterisk grid that makes collapsing the paper in the next step smooth and effortless.
Step 2: Collapse into an 8-Facet Preliminary Square Base
Gather the diagonal outer corners inward toward the center point along the pre-made creases, collapsing the sheet into a compact four-winged diamond base.
Ensure the open corner points downward and the closed single point faces upward toward what will become the treetop.
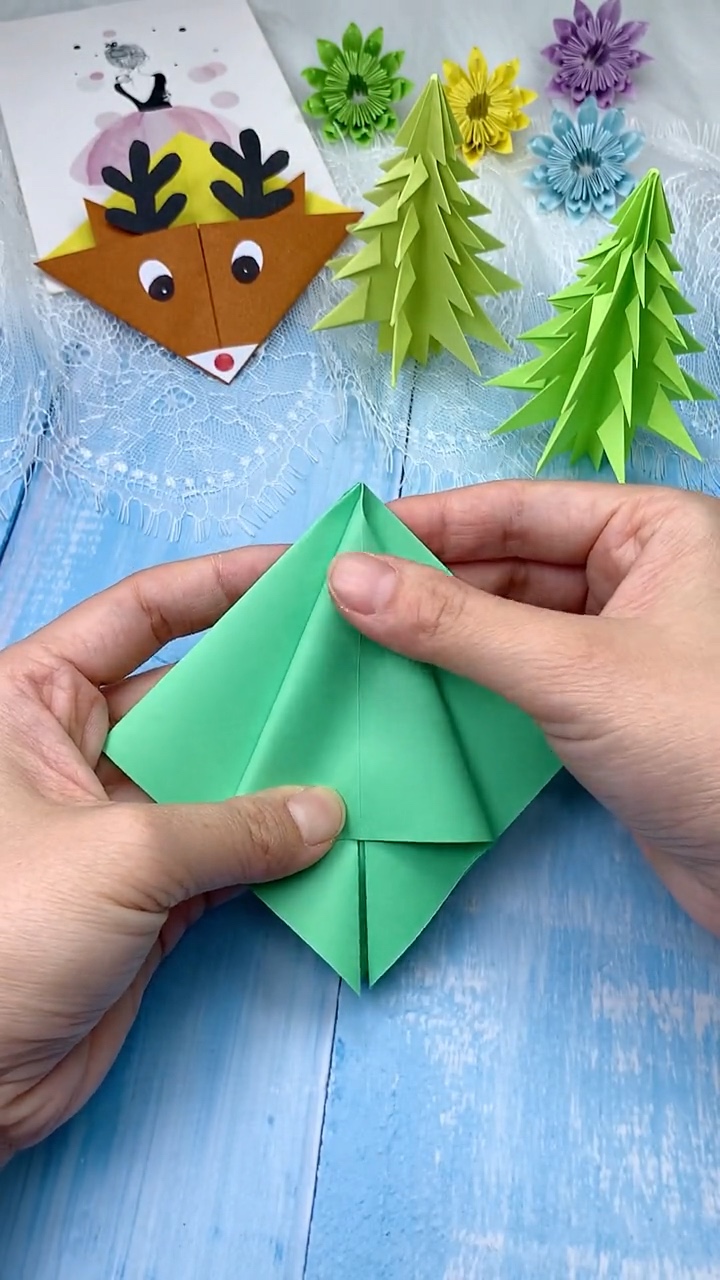
Step 3: Squash-Fold Each Flap into a Sleek Triangular Kite
Open up one outer flap and press it flat downward along the center line, creating a clean symmetrical squash fold. Turn the flap like a page in a book and repeat for all four wings.
You will now have an eight-faceted triangular cone shape with the folded spine running down the exact center.
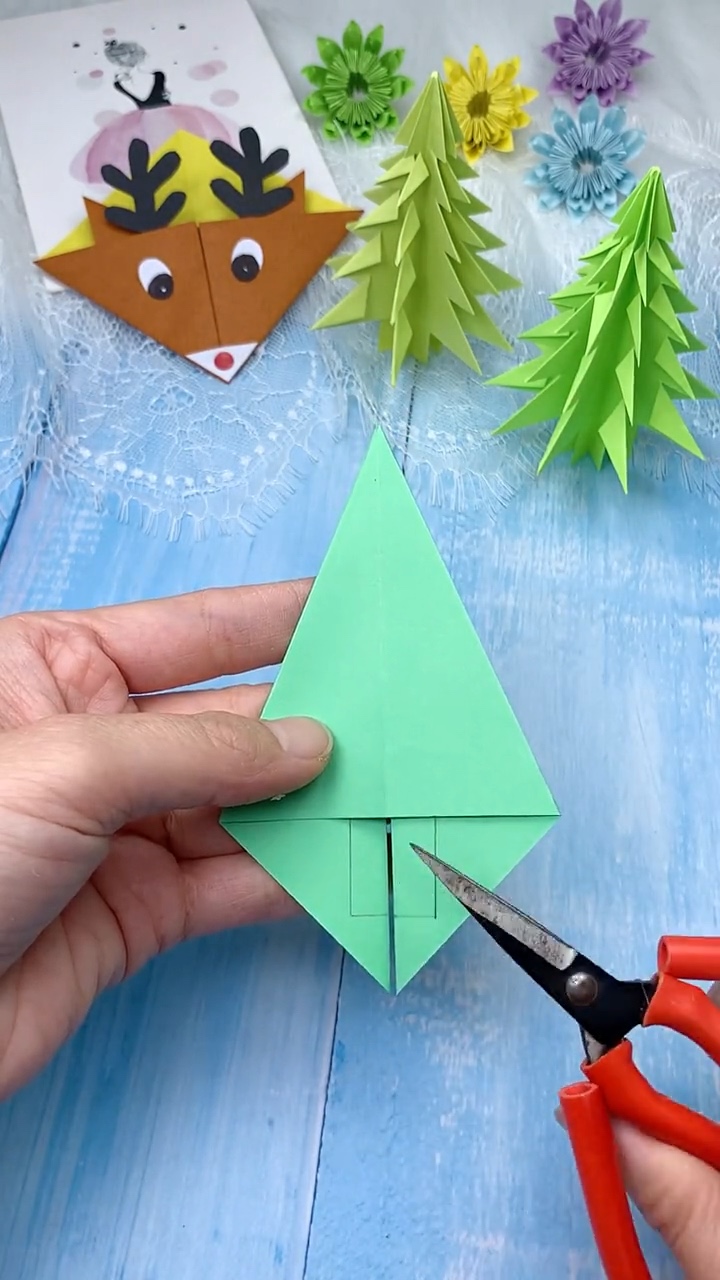
Step 4: Trim the Lower Trunk Flap Straight
Using your craft scissors, make a clean horizontal cut across the lower hanging triangular points, removing the uneven excess paper.
Make two small vertical notches along the center to separate the little standing trunk stem from the lowest branch tips. This gives your tree a stable standing foundation!
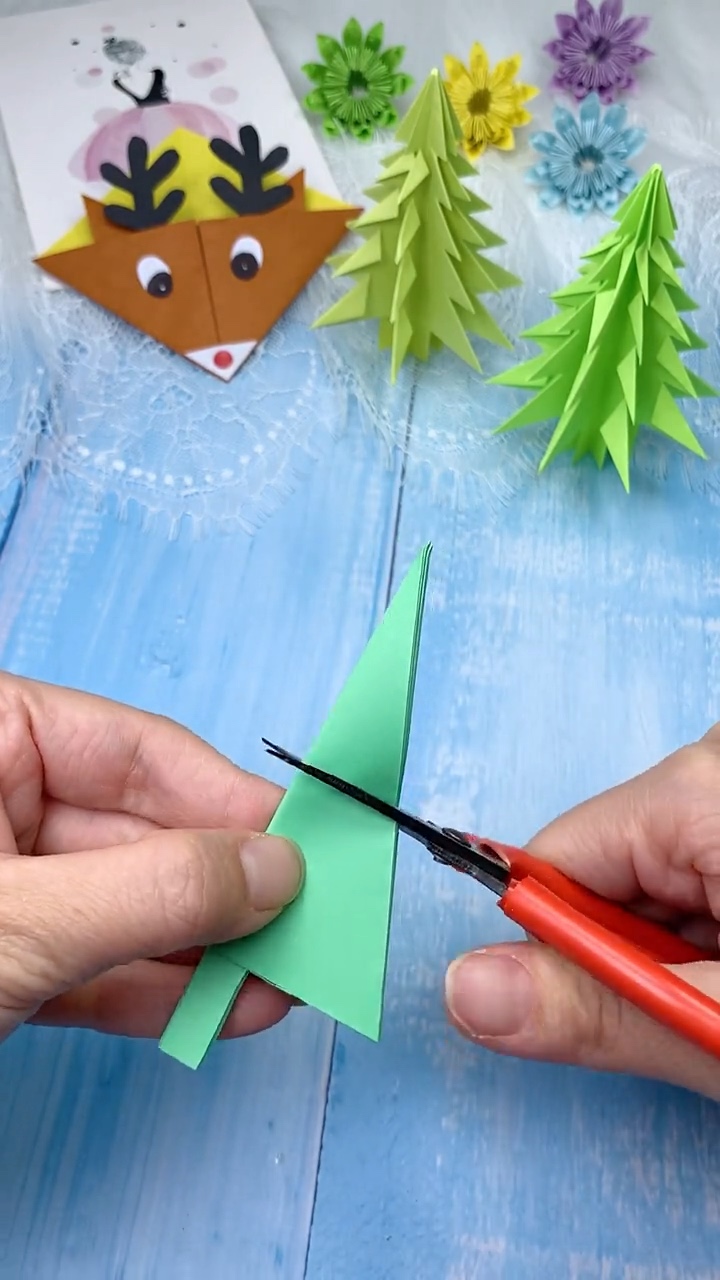
Step 5: Snip 3 to 4 Parallel Horizontal Slits Along Branch Sides
Holding all layered facets firmly together, make 3 or 4 parallel horizontal scissor cuts inward from the outer sloping edge on both sides.
Cut about two-thirds of the way inward, making sure not to cut all the way to the center crease so the tree stays completely intact.
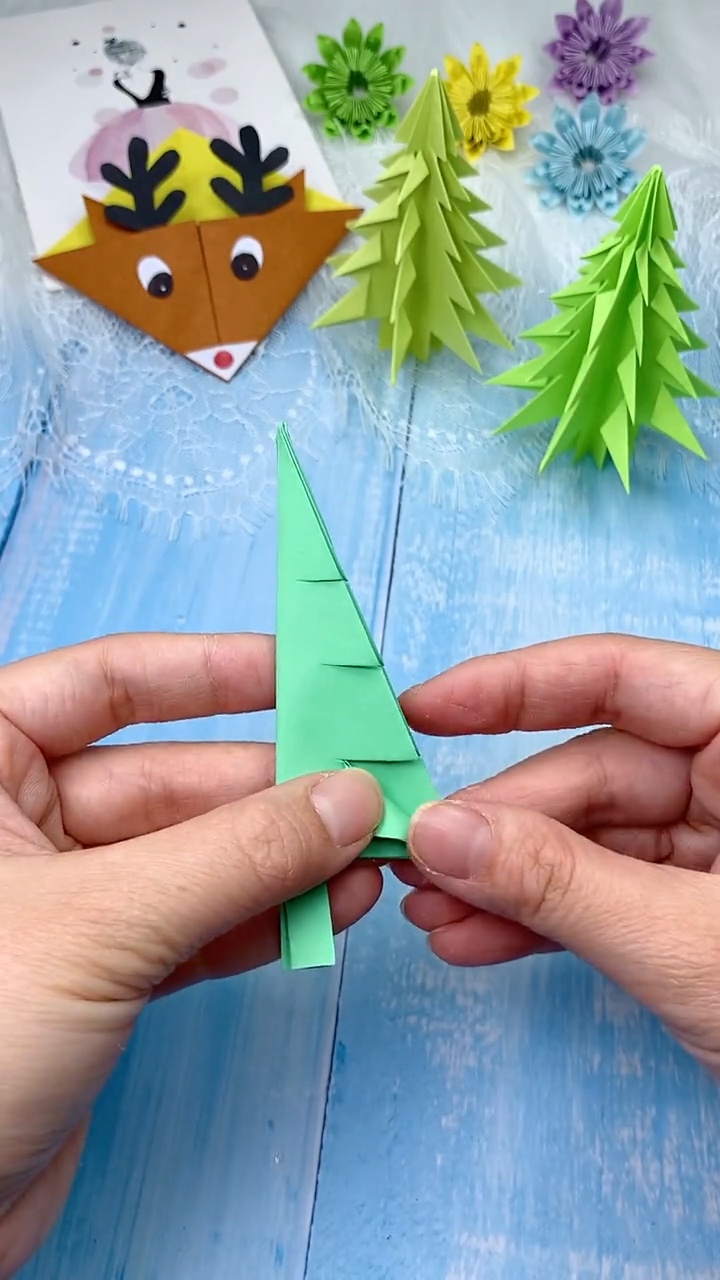
Step 6: Fold Down Evergreen Boughs & Fan Out into a 3D Tree
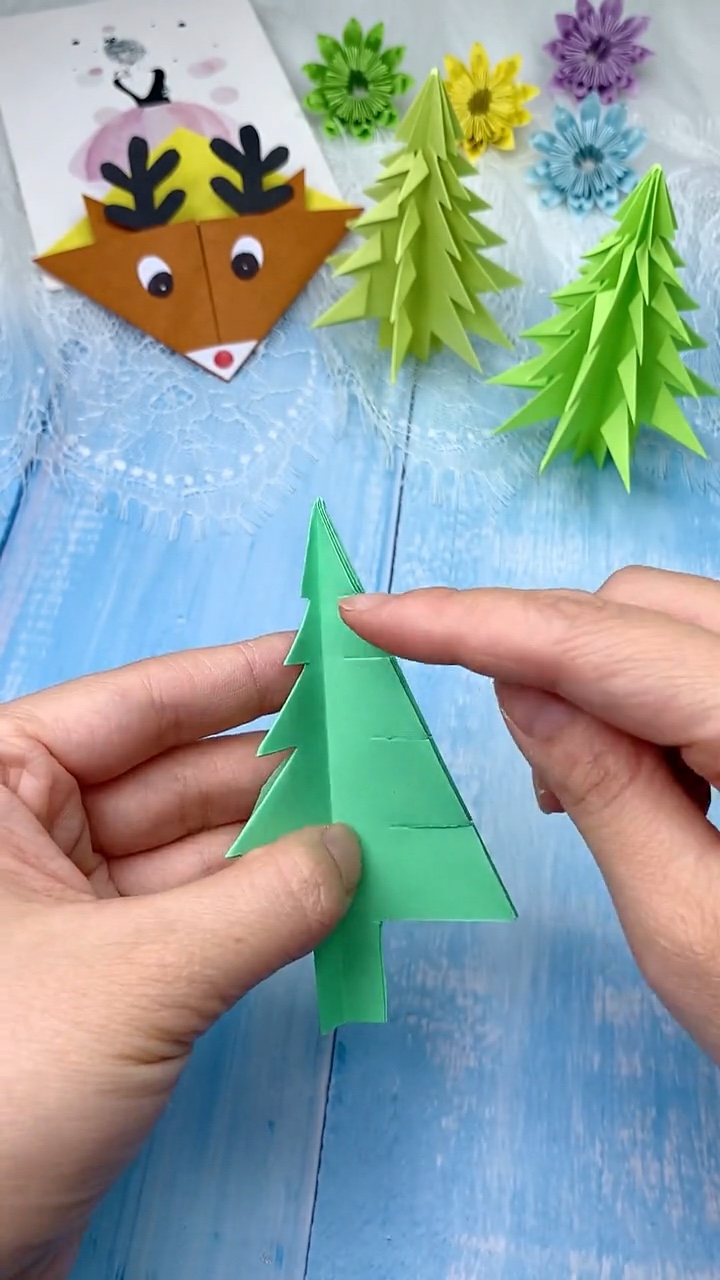
On each of the 8 individual facets, take each cut flap and fold it downward at a sharp 45-degree angle, creasing firmly to form a pointed evergreen bough.
Once all flaps are folded, gently spread the eight facets evenly around the central axis. Stand your tree on its trunk base and adjust the boughs for a full, lush 3D holiday silhouette!
4 Creative Ways to Display & Gift Your Creation
1. 🌲 Miniature Holiday Evergreen Forest
Fold trees in varying shades of emerald, sage, and lime green in different paper sizes (10cm, 15cm, and 20cm) to create an enchanting tiered forest on your mantel or coffee table!
2. 🎅 Festive Companion for Origami Santa
Display these standing trees beside our origami Santa Claus or our new origami Santa envelopes for a complete holiday vignette.
3. ⛄ Winter Village with Paper Snowmen
Group standing trees together with our 3D honeycomb paper snowmen and faux snow for a storybook winter scene.
4. 🏷️ Elegant Christmas Dinner Place Cards
Write guest names in metallic gold pen along the lower branch tiers or attach a tiny nametag star at the treetop for unforgettable personalized holiday table settings.
📌 Save This Holiday Paper Craft on Pinterest!
Loved this easy holiday paper crafting tutorial? Pin this post to your Christmas Crafts, Origami Ideas, or Holiday DIY board to inspire your festive season!