How to Make a 3D Origami Star Ornament with Tassels (Easy DIY Holiday Decor)
Learn how to make a 3D origami star ornament with tassels in 6 easy, step-by-step paper folding stages! Traditional origami lucky stars (hoshitachi) are known worldwide for their charming puffed facets and delicate geometric symmetry. In this easy DIY holiday craft guide, we transform simple paper strips into festive suspended ornaments complete with shimmering golden spacer beads and elegant silk tassels.
Whether you are decorating your Christmas tree, styling festive mantel garlands, or creating handmade handmade holiday gifts for loved ones, this beginner-friendly craft requires only paper strips, scissors, and basic threading cord. Follow along with our video demonstration and step-by-step photo guide below!
Watch the Step-by-Step Video Tutorial 🎥
Paper Craft Supplies & Materials ✂️
- Origami Star Paper Strips: Pre-cut paper strips (0.5 × 10.5 inches / 1.2 × 27 cm) in festive red, burgundy, or coordinating holiday tones. Regular 80 gsm copy paper cut into straight strips works wonderfully.
- Silky Embroidery Floss / Tassel: Red or gold stranded silk embroidery thread for assembling the lower decorative tassel.
- Metallic Spacer Beads: 4–6 small round gold or brass beads to thread between folded stars for luminous shine.
- Hanging Cord & Sewing Needle: Thin gold metallic embroidery thread or nylon monofilament cord with a slim tapestry needle.
- Pair of Craft Scissors: For trimming strip tails and evening out tassel fringe.
- Craft Glue: A tiny dab of clear craft glue or jewelry cement to secure knot ends inside the spacer beads.
Step-by-Step Visual Progression Sheet 📋
Here is your complete 6-stage visual master guide showing how a simple flat paper strip knots, wraps, puffs into 3D, and assembles into a hanging holiday star ornament:
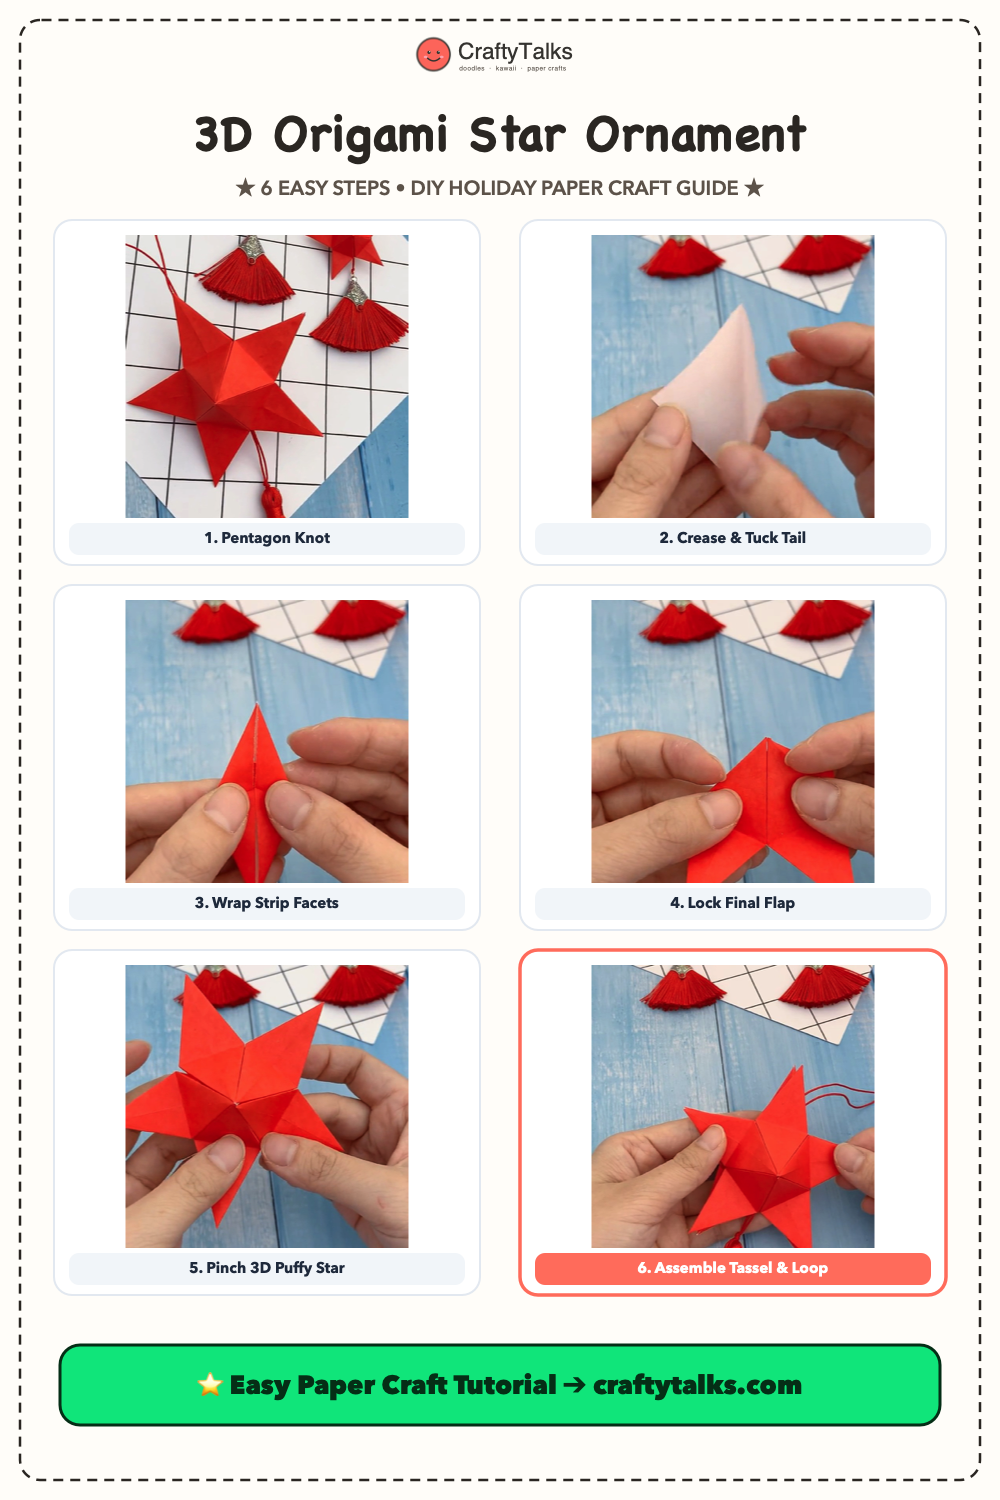
Step-by-Step Folding & Assembly Instructions ⭐
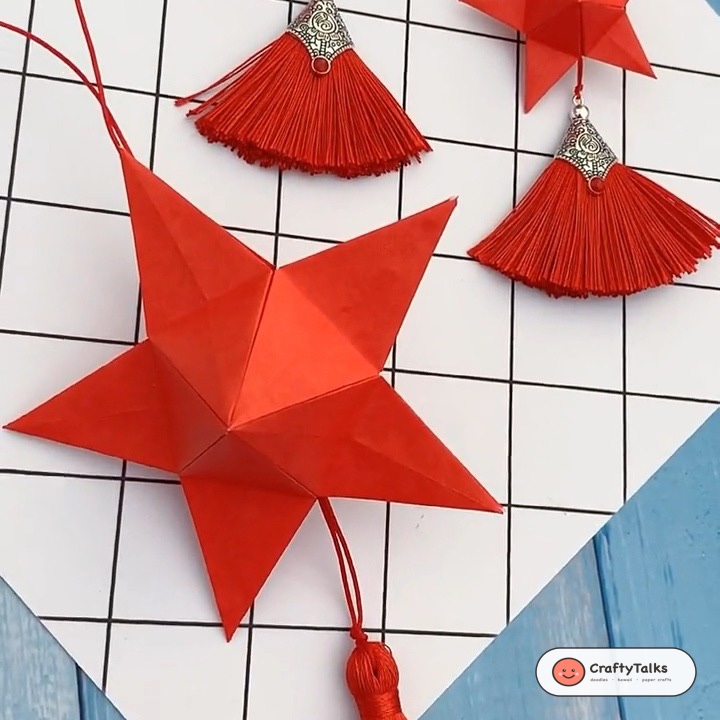
Step 1: Tie the Origami Strip into a Single Overhand Pentagon Knot
Take a pre-cut paper strip (approx. 0.5 inches / 1.2 cm wide by 10–11 inches / 25–28 cm long) in festive crimson red. Gently loop one end over and through itself near the tip to create a loose single knot, identical to tying a ribbon. Carefully slide and tighten the loop until a flat, symmetrical five-sided pentagon shape emerges.
💡 Craft Secret: Do not pull too aggressively; gently shimmy the paper until the pentagon sits completely flat without wrinkling the edges.
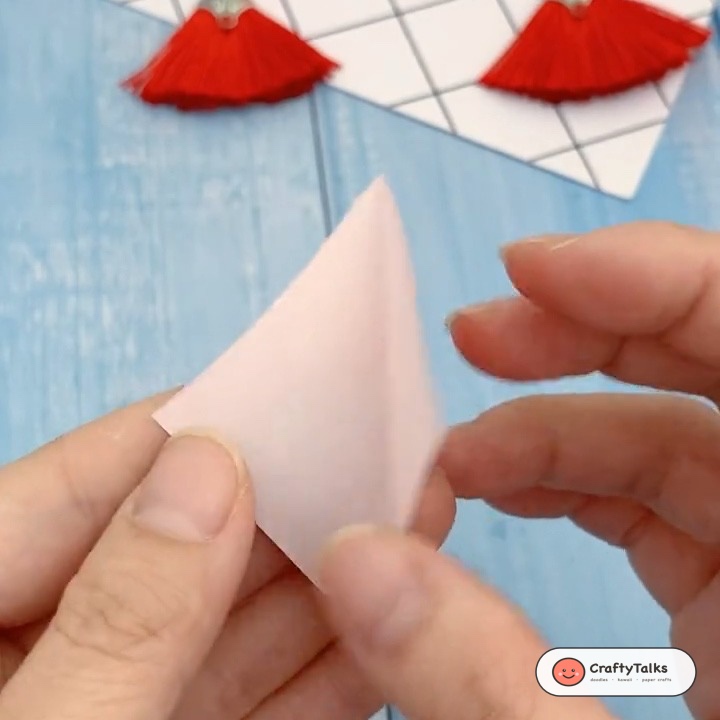
Step 2: Crease the Flat Pentagon & Fold the Short Tail Inward
Press the pentagon knot completely flat between your fingertips. Fold the short remaining paper tail back over the pentagon facet. If the tail extends beyond the border of the pentagon, tuck the excess neatly into the underside fold or trim it flush with craft scissors.
💡 Craft Secret: A crisp fingernail crease across the five base edges gives the star structural firmness needed for puffing later.
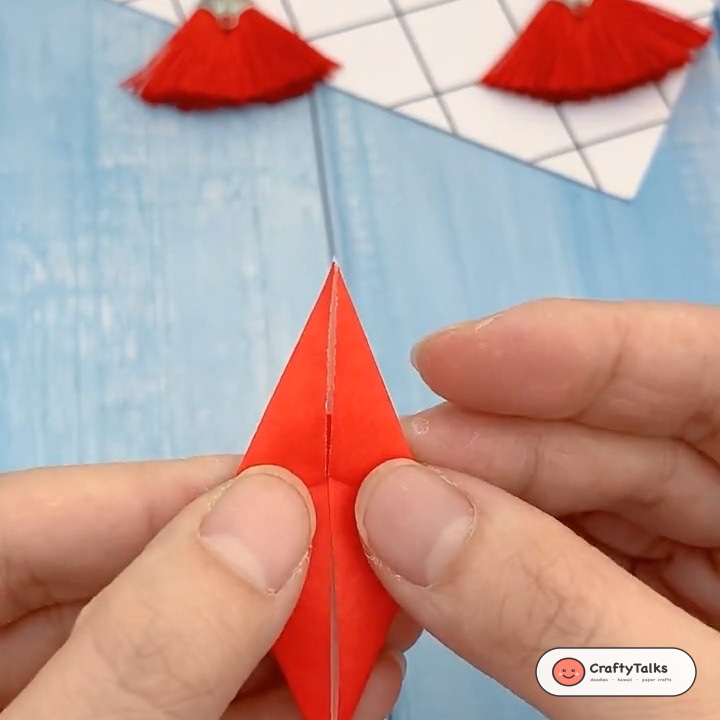
Step 3: Wrap the Long Paper Strip Around the Pentagon Facets
Take the remaining long strip of paper and begin folding it across the pentagon, following its natural geometric edge angles. Continue wrapping the strip snugly around and around all five facets of the pentagon, letting the paper guide its own direction with each fold.
💡 Craft Secret: Keep the strip wraps aligned neatly along each straight edge, avoiding wrapping too loosely or excessively tight.
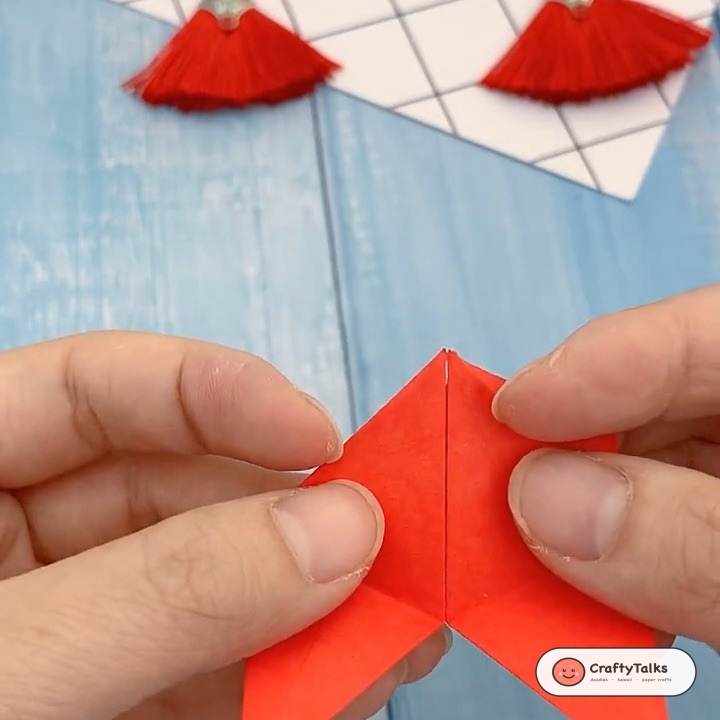
Step 4: Tuck the Final Flap Securely into the Slit Pocket
Once you reach the final 1 to 2 inches (2.5–5 cm) of the paper strip, fold it over the last facet. Tuck the remaining end flap securely into the fold slit on the face of the pentagon to lock all layers into a tidy, self-contained geometric polygon.
💡 Craft Secret: If the final flap is slightly too long, snip a small diagonal angle off the tip so it slides smoothly into the slit pocket.
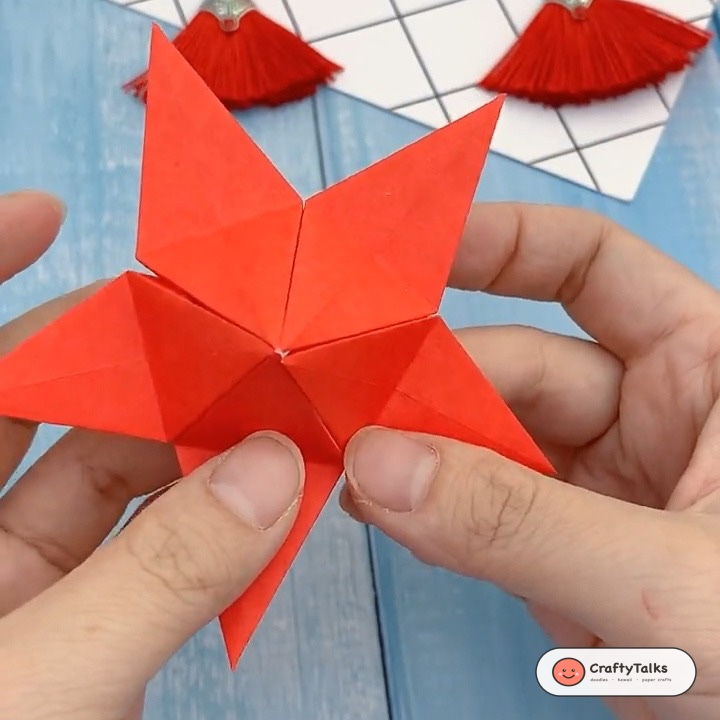
Step 5: Pinch the Five Edges Inward to Puff into a 3D Star
Hold the flat pentagon gently along its rim with the thumb and index finger of one hand. Using the fingernail of your other thumb, press gently inward at the center of each of the five straight edges. The facets will pop outward, expanding the flat pentagon into a gorgeous, plump 3D lucky star!
💡 Craft Secret: Work around all five sides evenly, pressing with gentle progressive pressure until all points expand symmetrically.
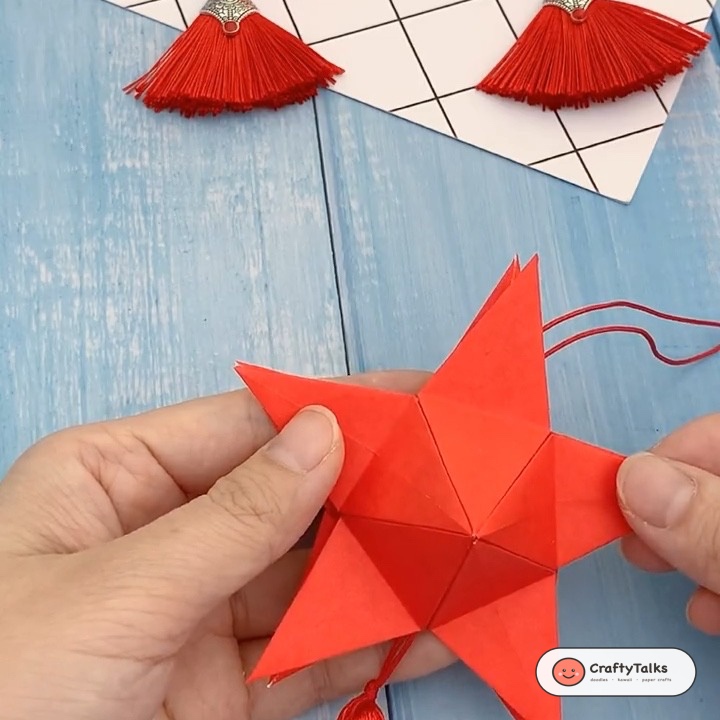
Step 6: Thread the Stars with Metallic Beads & Silk Tassel
Fold and puff two to three complementary origami stars. Thread a sewing needle with metallic gold cord, pierce through the centers of the puffed stars, string golden spacer beads between each star tier, and tie the lower end securely to a handmade silk embroidery floss tassel. Knot the top cord into a hanging loop to finish your ornament.
💡 Craft Secret: A drop of craft glue at the knots inside the beads ensures your hanging ornament remains sturdy and balanced on holiday branches.
Festive Holiday Craft Palette & Materials Guide 🎨
Combine classic crimson paper with shimmering metallic gold and rich silk textures for timeless holiday elegance:
Vibrant festive red paper strips folded and puffed into plump 3D lucky stars.
Gleaming metallic spacer beads threaded between star tiers for holiday shimmer.
Soft flowing embroidery floss tassel weighting the base and creating movement.
Durable metallic cord loop designed for easy hanging on Christmas trees and garlands.
Save to Pinterest & Craft for the Holidays!
Pin this DIY origami star ornament tutorial to your Christmas crafts, paper folding, or handmade holiday decor board so you can make more whenever inspiration strikes!
More Festive Holiday Paper Crafts to Explore
🎅 DIY Paper Circle Santa Claus Ornament — Easy handmade holiday bauble with scalloped beard.
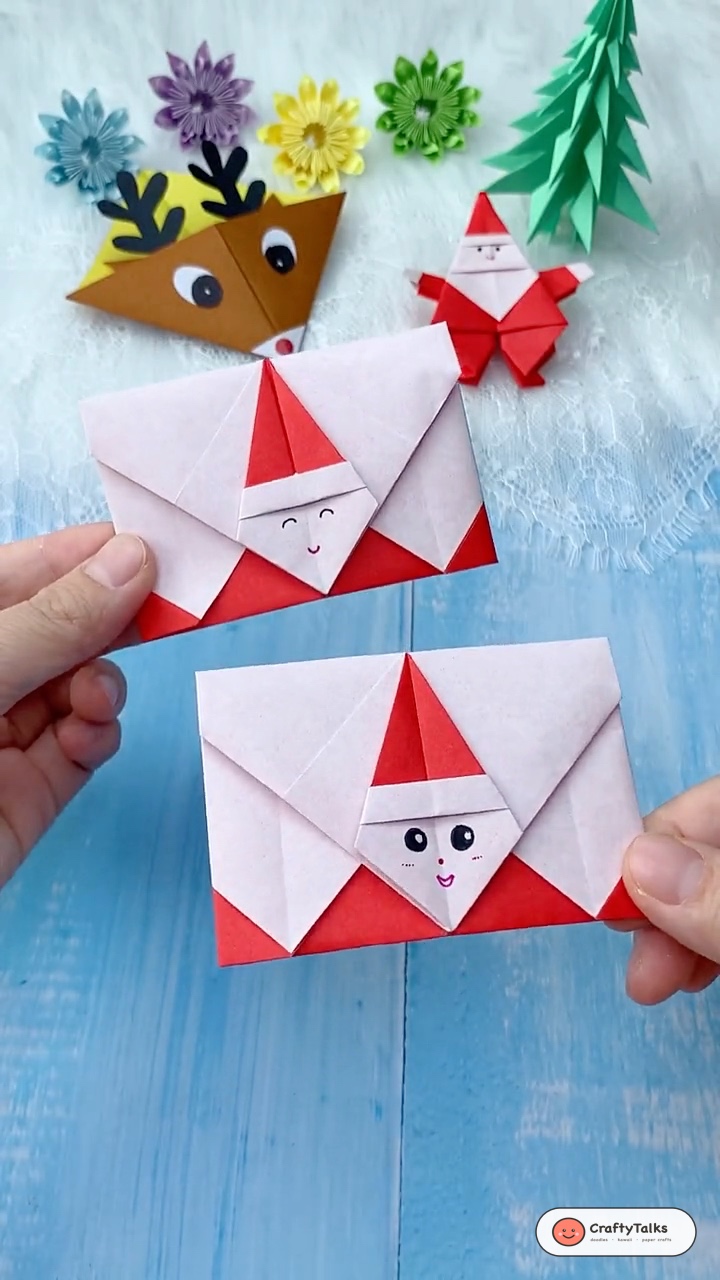
🦌 How to Make an Origami Reindeer Bookmark — Cute corner bookmark craft with festive antlers.