How to Make an Origami Santa Envelope (Cute DIY Christmas Letter Pouch)
Spread instant holiday joy with this darling DIY Origami Santa Envelope! Whether you are tucking a holiday gift card under the tree, sending a secret note to Santa, or delivering heartfelt Christmas wishes to friends and family, this clever folded paper pouch turns ordinary gift-giving into an unforgettable handmade moment.
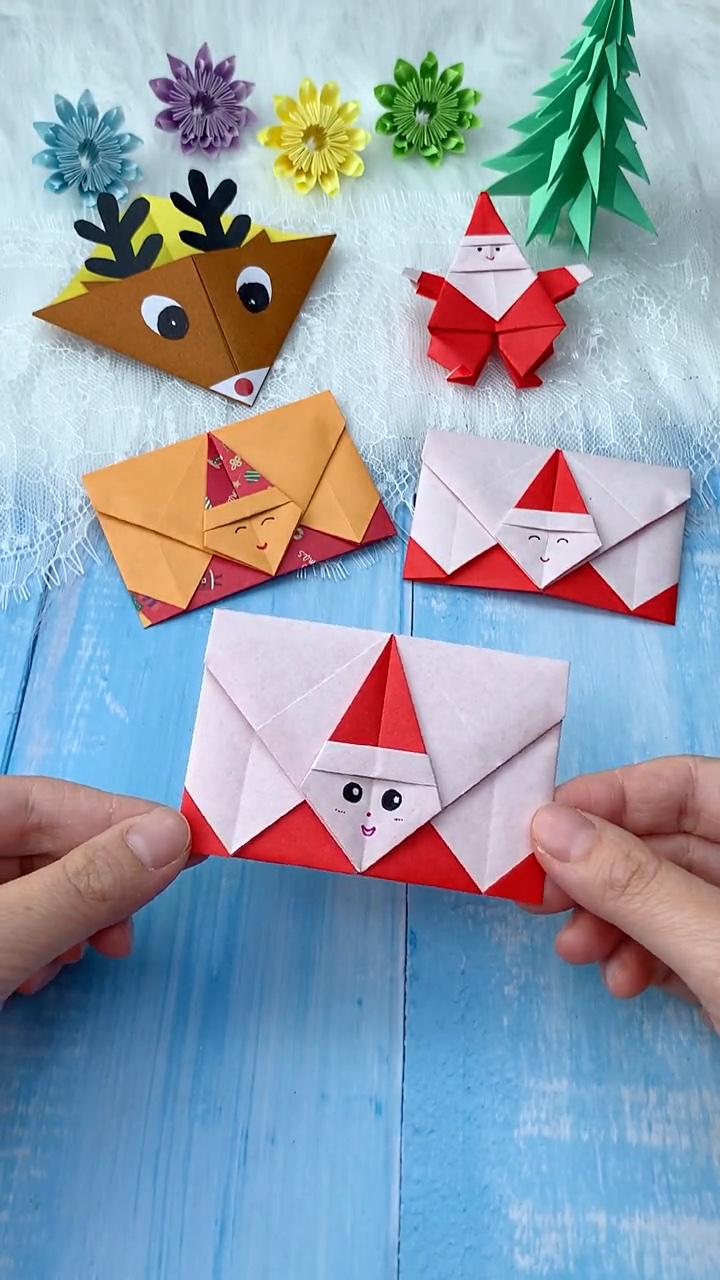
What makes this festive envelope so magical is the clever origami geometry: using just a single sheet of square red-and-white origami paper, the fold naturally creates a sturdy rectangular envelope pocket while the top flap transforms into Santa Claus’s iconic pointed hat and fluffy white beard! In less than eight minutes, you will have a darling holiday letter pouch ready to hold gift cards, secret messages, or festive table place cards.
Craft Overview: At a Glance
⏱ Time Needed:
6 – 8 Minutes
🎯 Skill Level:
Beginner Friendly
📄 Recommended Paper:
1 Square (15×15 cm) Red/White Origami Paper
🎄 Occasion:
Gift Card Holder, Holiday Notes & Place Cards
Supplies & Materials Checklist
Here is everything you will need before you begin folding and shaping:
Paper & Essentials
- 1 Sheet of Square Origami Paper (15×15 cm / 6×6 in): Single-sided red paper with a clean white reverse side is ideal. The red becomes Santa’s pointed cap and jacket trim, while the white side creates his snowy beard and crisp envelope interior.
- Black Gel Pen or 0.5mm Fineliner: To draw Santa’s joyful twinkling eyes and warm holiday smile.
- Pink Colored Pencil or Highlighter: For dabbing two gentle blushing cheek ovals on Santa’s face.
Optional Enhancements
- Bone Folder or Ruler: Excellent for pressing flat, crisp creases so the envelope lays completely flush.
- Small Glue Dot or Holiday Sticker (Optional): If you want to temporarily seal the flap shut for mailing or gifting.
- Festive Gift Cards or Mini Note Paper: To tuck inside your completed Santa pouch!
Watch the Step-by-Step Video Tutorial
Follow along with our real-time crafting demonstration below to see each crease, fold, and envelope tuck in motion:
Pro Crafter Secret: Keep White Borders Symmetrical
When making your very first folds along the two adjacent edges in Step 1, take a quick moment to ensure the two white margin strips are identical in width (approximately 6mm each). This tiny detail guarantees that Santa’s hat brim and his beard flap line up with crisp geometric symmetry when the envelope is closed!
Step-by-Step How to Make an Origami Santa Envelope Tutorial
Step 1: Crease Narrow White Margins on Adjacent Edges
Place your square origami sheet flat on your crafting mat with the vibrant red side facing upward. Along two adjacent edges (one side edge and one top edge), fold a narrow border strip approximately 6mm to 8mm wide backward so the clean white reverse side is revealed.
Press firmly along each edge with your fingertip or a bone folder. These two crisp white margins will become Santa’s fluffy hat trim and the snowy edge of his beard flap.
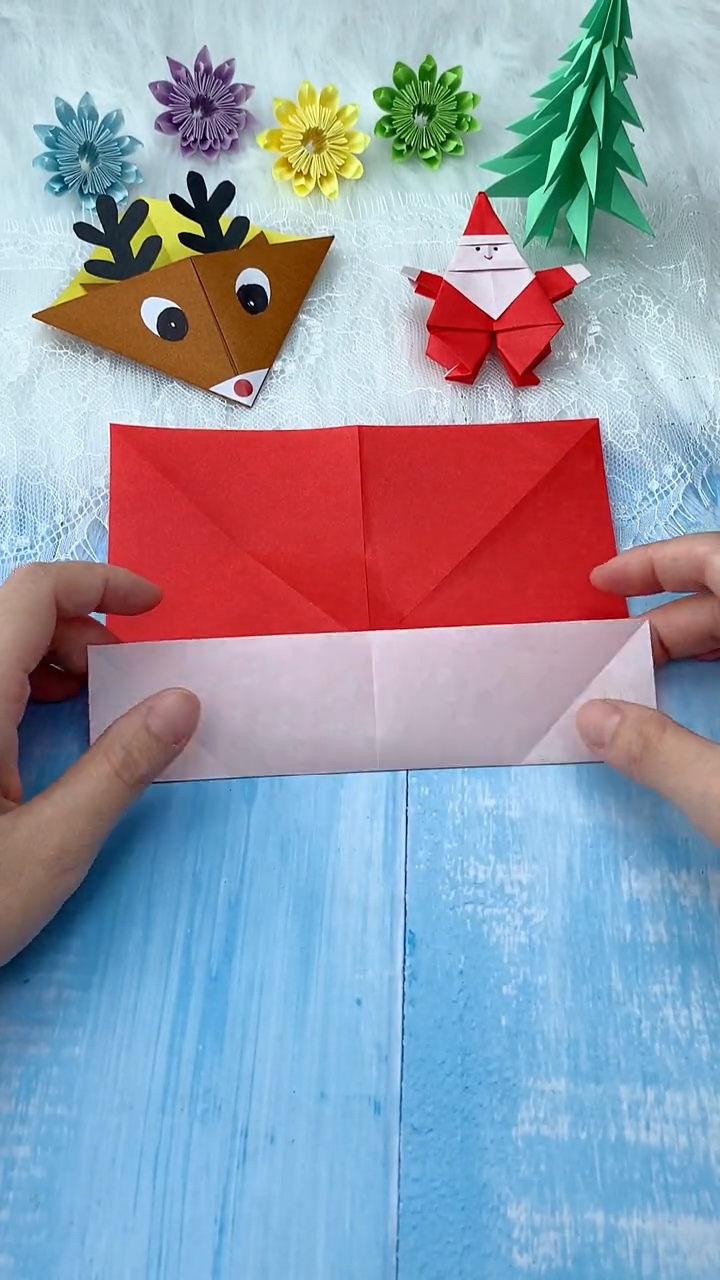
Step 2: Crease Diagonals & Fold Corner Wings Inward
Flip the sheet over to the white side. Gently pinch the center diagonal line to create an alignment guide, then bring the lower corner upward toward the center intersection.
Notice how the folded corners begin establishing the foundation of the envelope pouch while framing the red accent points along the outer edges.
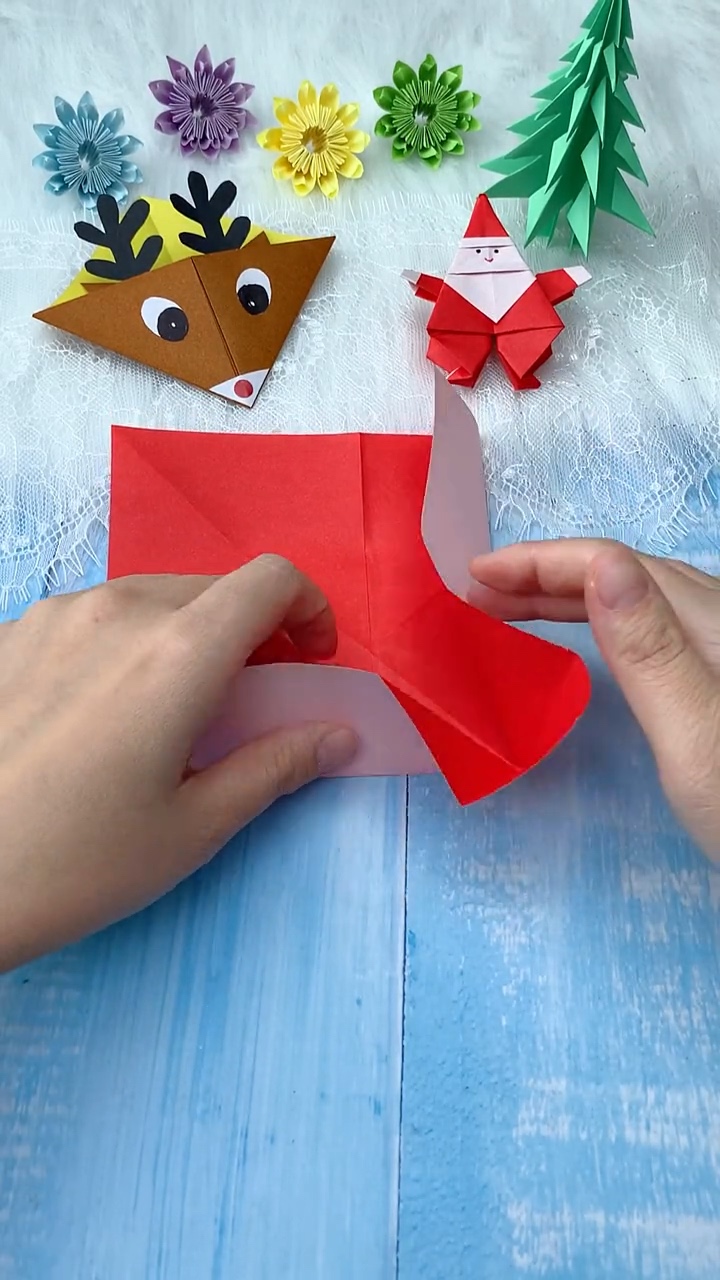
Step 3: Fold Side Wings Inward to Establish the Envelope Width
Take the left and right outer wings and fold them inward toward the center vertical crease. Ensure both vertical fold lines are completely parallel and straight.
This creates the clean rectangular outer borders of your envelope and locks the internal paper layers snugly in place so the pouch maintains its structure.
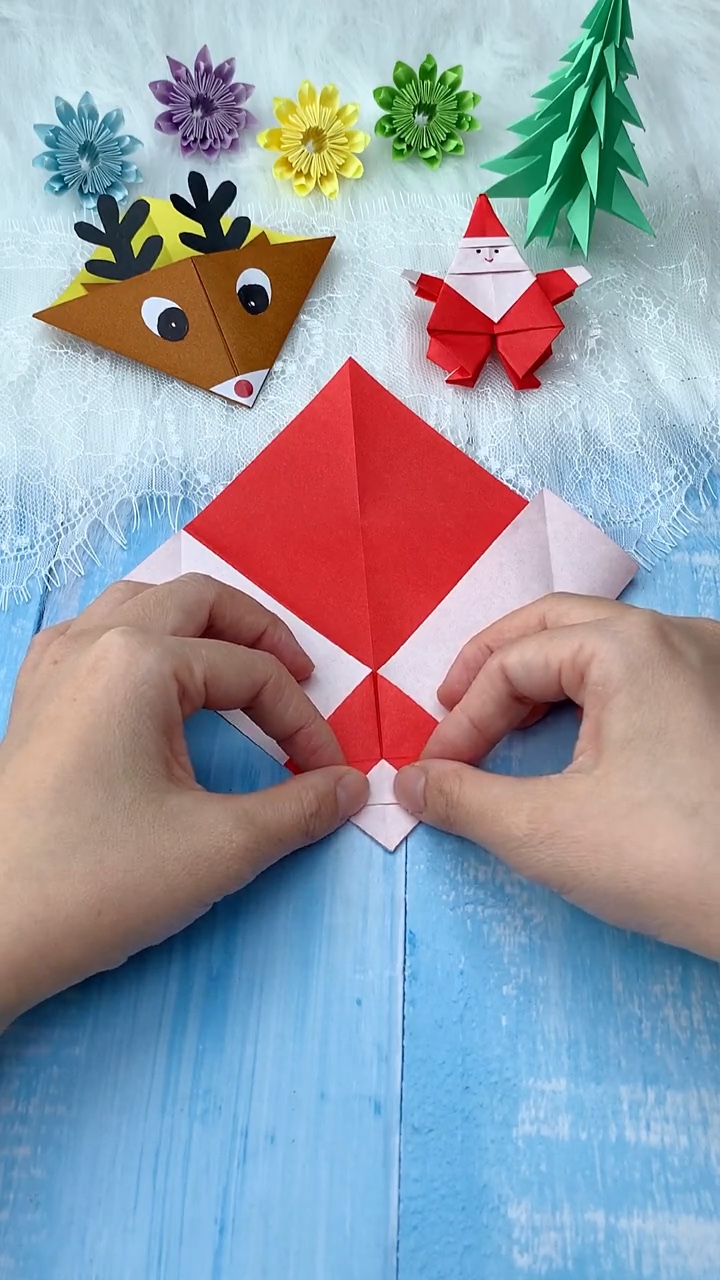
Step 4: Fold the Bottom Flap Upward into a Deep Pocket Pouch
Now bring the bottom triangular section upward, creasing along the lower horizontal fold line. This creates the deep pocket cavity of the envelope where cards and notes will rest.
Tuck the side corners slightly under the inner folds to secure the pocket edges without needing any glue or tape!
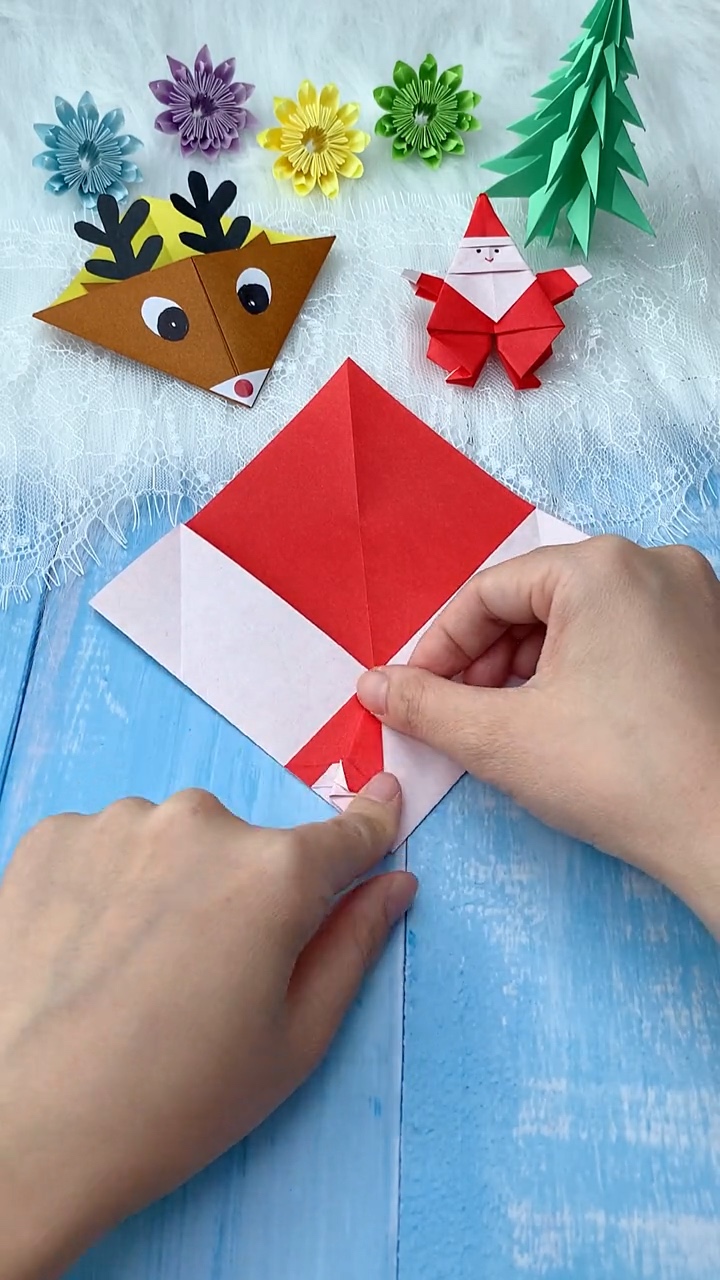
Step 5: Fold the Santa Hat Flap & Accordion Beard
Bring the upper pointed flap downward over the envelope opening. Take the tip of the flap and fold it back upward in a neat accordion pleat.
As you press this pleat, the crisp white reverse side emerges as Santa’s diamond beard, framed perfectly beneath his pointed red stocking cap with snowy white fur trim!
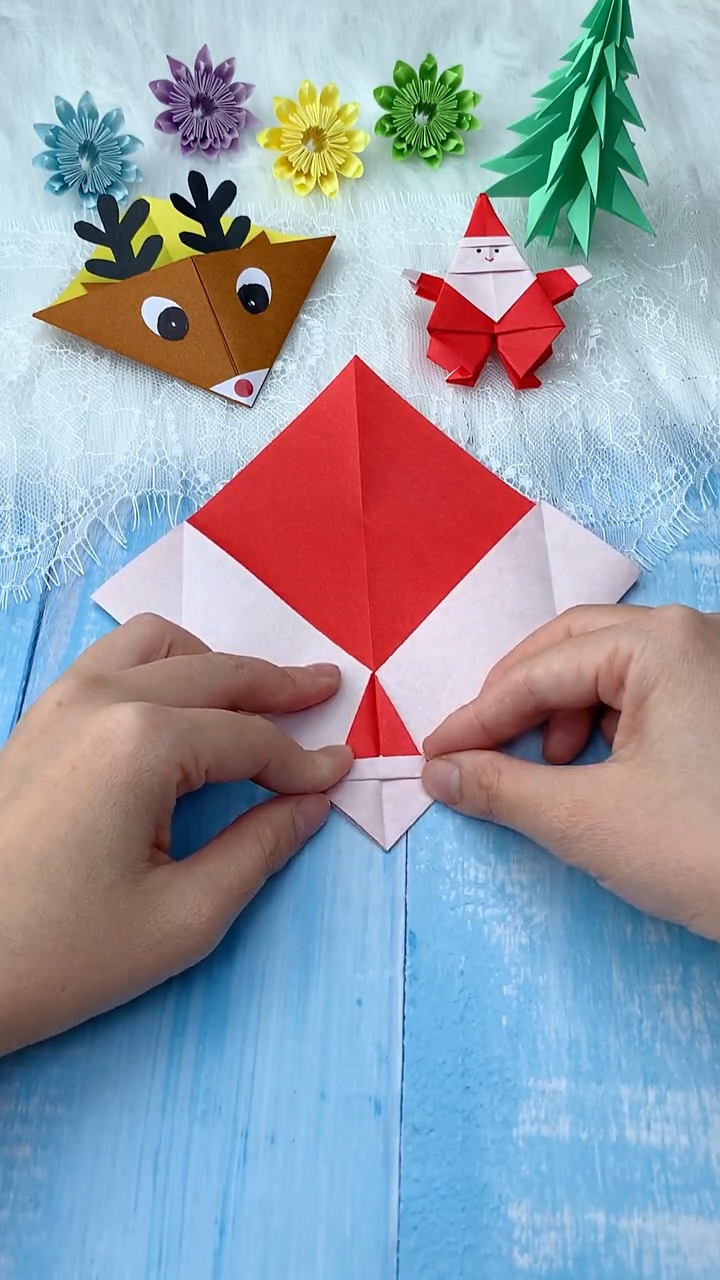
Step 6: Draw Facial Charm & Slide in Your Holiday Note
Using your black gel pen, draw two wide, cheerful smiling eyes and a sweet little mouth on the white face area. Add two soft pink blushing cheek ovals with a colored pencil for instant kawaii charm.
Slide your gift card, holiday cash, or handwritten message right inside the pouch, then tuck Santa’s beard flap down to close. Your handmade Origami Santa Envelope is complete and ready to gift!
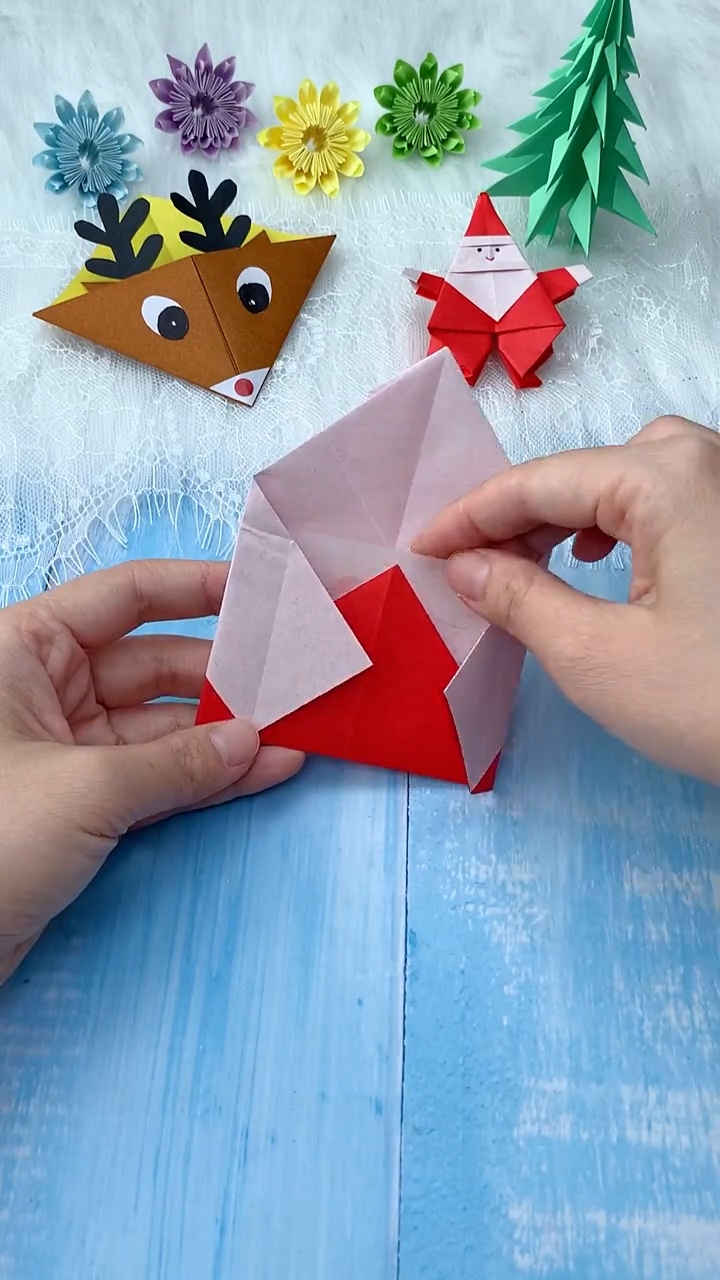
4 Creative Ways to Display & Gift Your Creation
1. 🎁 Holiday Gift Card & Cash Holder
Standard retail gift cards, holiday movie passes, and folded bills fit snugly inside this handmade Santa pouch, making it the sweetest way to dress up practical gifts!
2. 🌲 Pair with Standing Christmas Trees
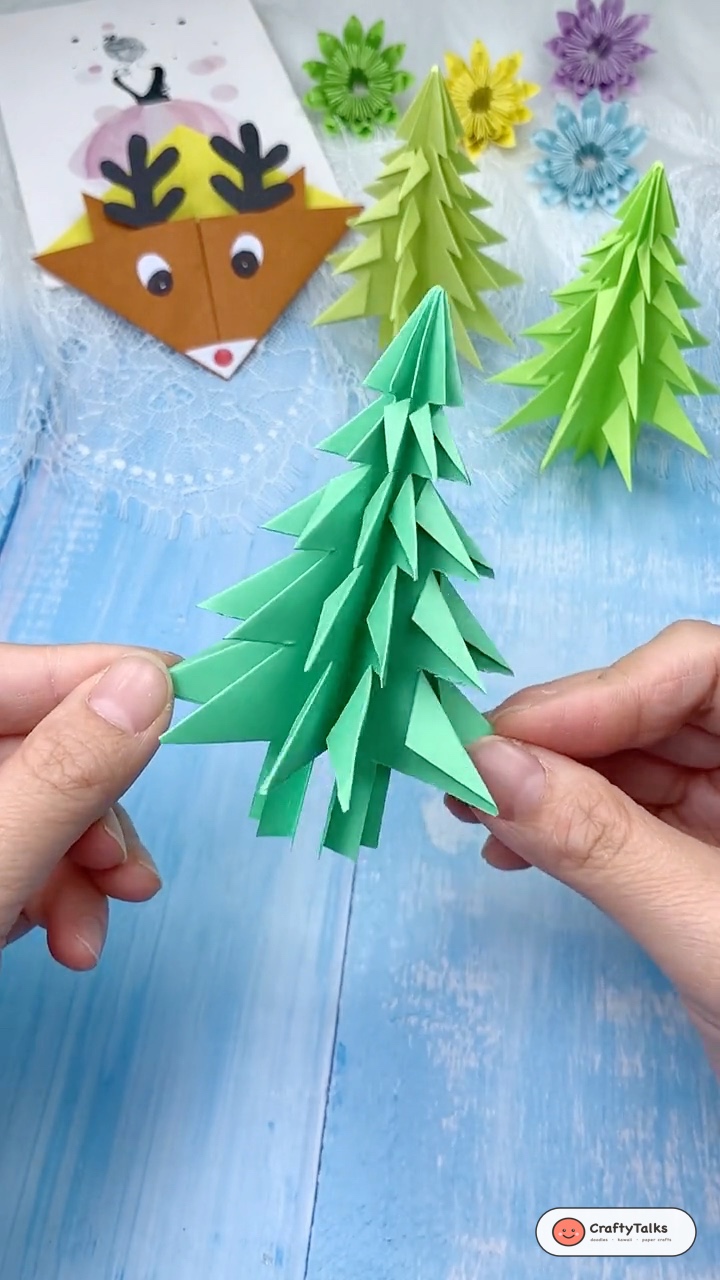
Display your Santa envelopes standing on a mantel beside our 3D paper Christmas trees or tuck them directly between evergreen branches on your tree.
3. 🏷️ Festive Dinner Place Settings
Write each dinner guest’s name on a small card inside the pouch or pair them alongside our freestanding origami Santa Claus figures for festive Christmas Eve table decor.
4. 💌 Santa’s Secret Delivery Mailbox
Let little ones fold their own envelopes to send wish lists to the North Pole, or leave a tiny note from Santa tucked inside on Christmas morning!
📌 Save This Holiday Paper Craft on Pinterest!
Loved this easy holiday paper crafting tutorial? Pin this post to your Christmas Crafts, Origami Ideas, or Holiday DIY board to inspire your festive season!