How to Draw a Fast Cartoon Cheetah in 6 Easy Steps (Interactive Draw-Along)
Learn how to draw a fast cartoon cheetah in 6 simple, step-by-step stages! Whether you are filling your daily animal sketchbook, creating lively savanna illustrations for kids, or looking for an easy beginner drawing tutorial, this masterclass breaks down the world’s fastest land mammal into accessible basic shapes, powerful galloping gesture curves, and signature aerodynamic anatomy.
Interactive Draw-Along Studio: Cartoon Cheetah Edition
Try our interactive digital drawing studio right below! Trace each construction stage, toggle guidelines, test custom savanna color palettes, and download your high-resolution artwork when finished.
 Step Guide 🔍
Loading Step...
Loading instructions...


Switch to Another Animal
Pick any animal below to start a new step-by-step draw-along!
Step Guide

🎉 High Five, Artist!
Your custom animal illustration is ready to download and share!

Cheetah Anatomy & Speed Fundamentals for Artists
Unlike stocky big cats like the noble lion or compact leopards, the cheetah is nature’s ultimate biological dragster. When sketching a cheetah at full sprint, three anatomical design rules will bring your artwork to life:
- Extreme Spinal Flexion & Extension: A sprinting cheetah bends its flexible spine like an elastic bow, coiling tight on the gather and stretching long on the release. A bold initial S-curve line captures this kinetic energy immediately.
- Deep Chest vs. Cinched Waist: Cheetahs possess an oversized heart and lung capacity housed inside an expansive chest, balanced by a slender, high-tucked greyhound belly.
- The Tail as an Aerodynamic Rudder: The long, heavy, muscular tail acts as a dynamic counterweight, enabling the cheetah to execute sharp, high-speed directional cuts without rolling over.
Step-by-Step Cartoon Cheetah Drawing Tutorial
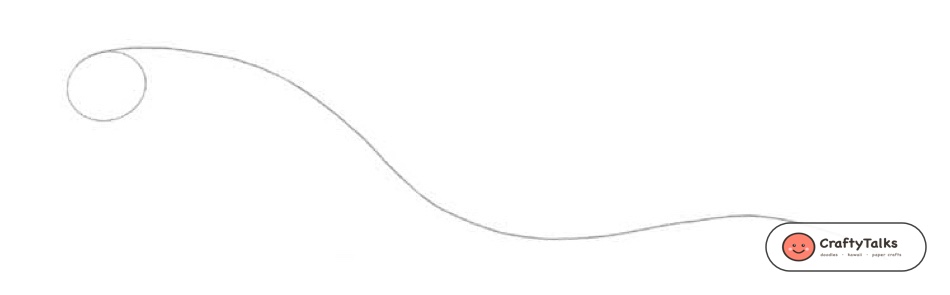
Step 1: The Cranium Circle & Flowing Spine S-Curve
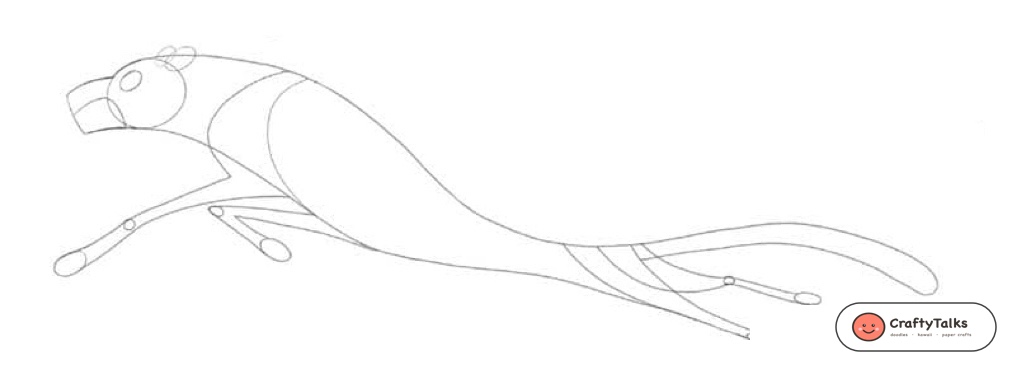
Start with a light 2H pencil. Draw a clean circle for the skull cranium near the upper-left of your page. From the top of the head circle, extend a long, sweeping S-curve line that arches down along the neck, dips along the back, and undulates outward for the spine and tail gesture.
Step 2: Muzzle Wedge & Limb Armatures
Attach a boxy, slightly tapering muzzle block to the front of the skull. Next, establish the limbs using lightweight armature sticks: drop the forward front leg angled sharply ahead with a small circular wrist joint, and block out the angled thighs and rear paw stick stretching backward.
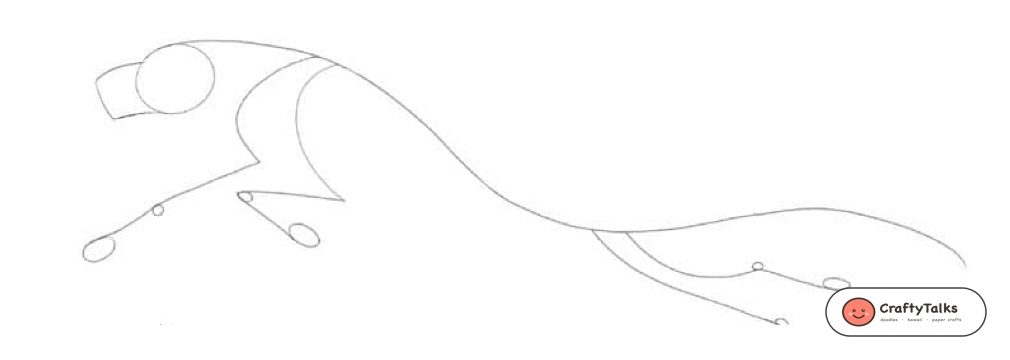
Step 3: Aerodynamic Chest Mass, Slender Flank & Tail
Connect the under-neck contour into a deep, muscular chest volume. Taper the belly line steeply upward into a cinched greyhound waist. Trace the upper and lower borders of the long, slender tail, and outline the muscular contours of the bent foreleg and extended hind haunch.
Step 4: Snarling Expression, Ears & Claws
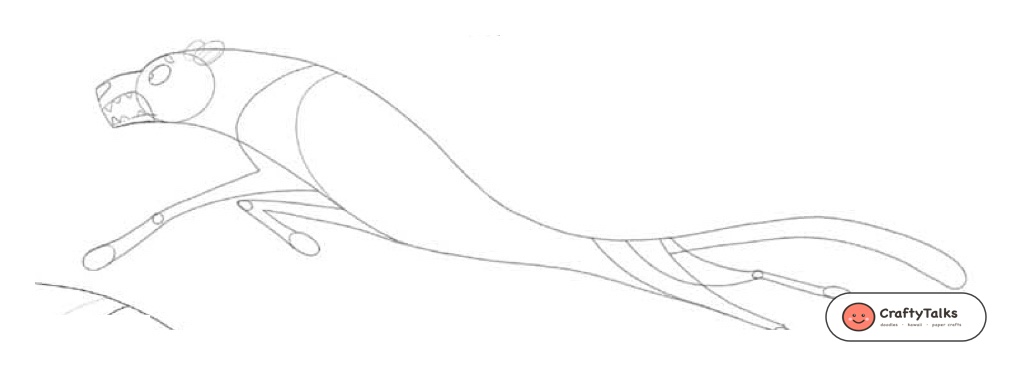
Now breathe cartoon personality into the face! Draw an almond eye with a focused pupil and intense forward brow. Open the muzzle into a snarling mouth showing upper and lower sharp teeth. Add small rounded aerodynamic ears and draw the distinct non-retractable running claws on each paw.
Step 5: Defined Muscular Inking & Clean Contours
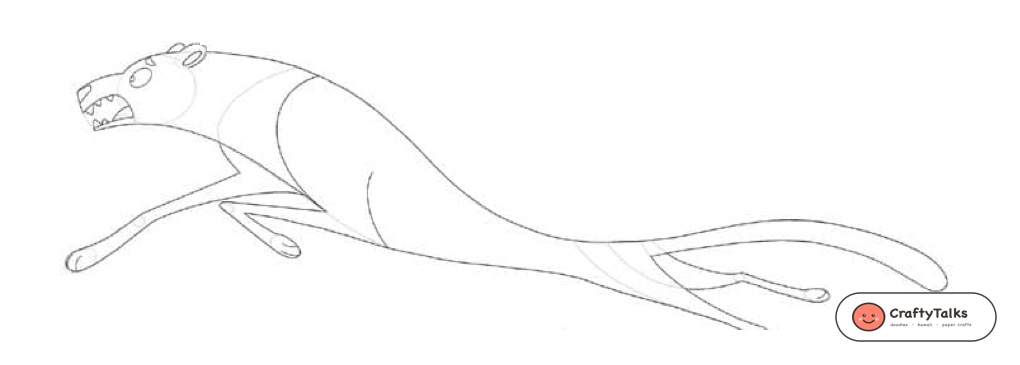
Switch to a dark fine-liner or brush pen. Trace your permanent outline contours over the pencil armature with smooth, decisive strokes. Emphasize the aerodynamic shoulder blade, flexible spine line, and muscular rear leg drive. Once the ink dries completely, gently erase all underlying structural guidelines.
Step 6: Signature Spots, Shading & Savanna Polish
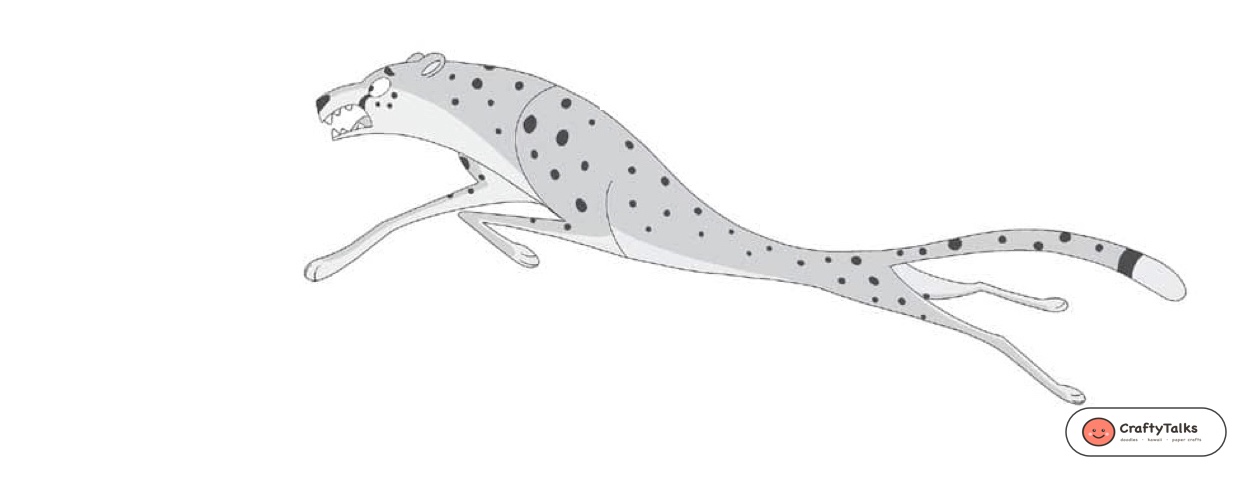
The hallmark of every cheetah is its breathtaking spot pattern! Scatter solid black rosettes and spots across the back, flanks, and limbs, keeping them smaller and denser near the spine. Draw the bold black tear line running from the inner eye to the corner of the mouth, ring the tail with dark bands, and layer rich tawny amber fur tones with warm ivory along the chin and underbelly.
Mastering the Signature Cheetah Tear Lines
In wildlife art, many beginners mistakenly draw cheetah spots like leopard rosettes. Remember two essential rules for authenticity:
- Solid Spots vs. Rosettes: Cheetah spots are distinct, solid black circular dots—not hollow circles with brown centers like leopards and jaguars.
- Malar Tear Streaks: The black line starting at the corner of each eye serves a crucial purpose: it absorbs glare from the intense midday African sun, functioning exactly like black greasepaint worn by football players.
Save to Pinterest & Share Your Savanna Artwork!
Pin this tutorial to your favorite animal drawing or sketchbook ideas board so you can revisit the steps whenever inspiration strikes!