How to Draw a Realistic Coneflower (Echinacea) in 6 Easy Steps
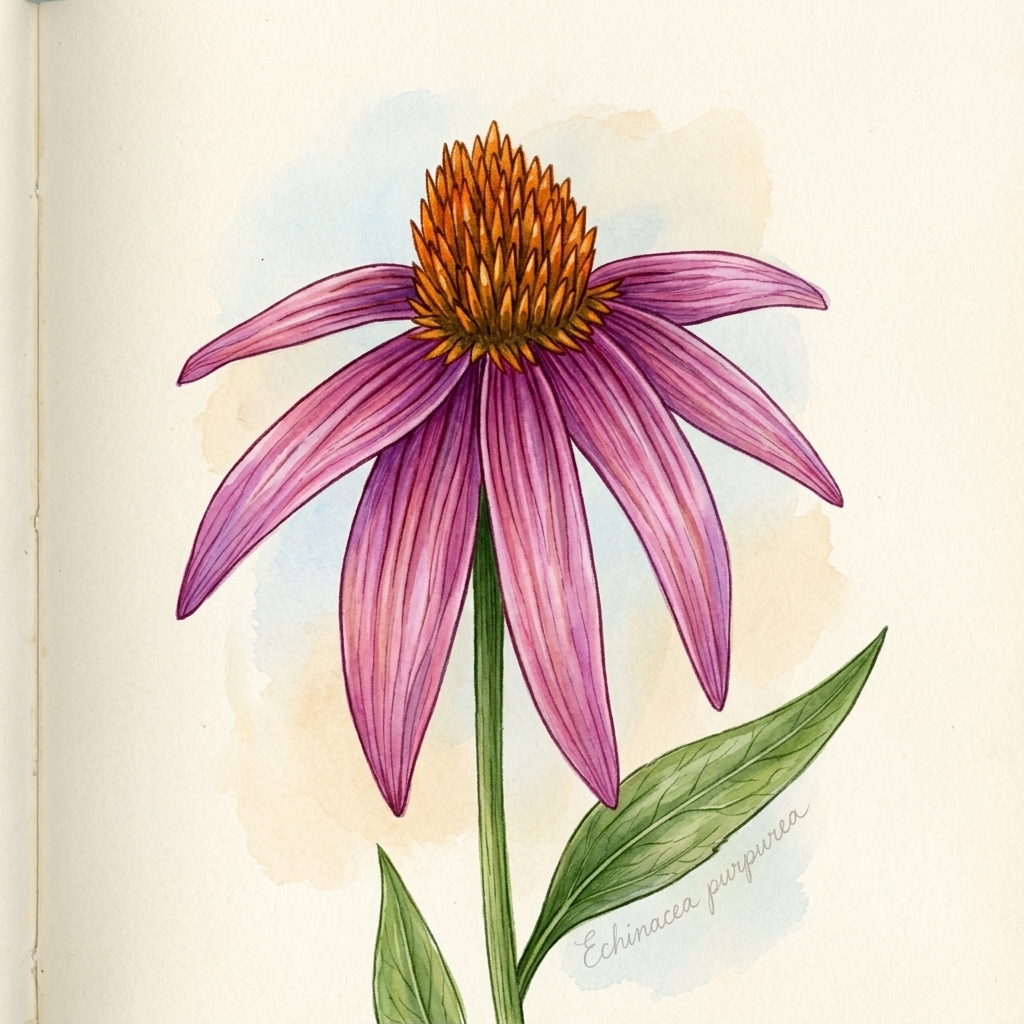
The Purple Coneflower (Echinacea purpurea) is a crown jewel of wild cottage gardens and nature journals. Unlike flat, symmetrical daisies, coneflowers possess a dramatic, sculptural silhouette: a prominent domed center cone packed with spiky florets, encircled by long, drooping ray petals that curve downward like an open parachute. This unique anatomy makes Echinacea one of the most rewarding flowers for mastering radial perspective, overlapping petal planes, and botanical pen hatching.
In this botanical step-by-step masterclass, you will learn how to build a realistic coneflower from an architectural geometric armature into a finished fine-art ink drawing. Follow along in your sketchbook or practice directly in our Interactive Draw-Along Studio below!
- Difficulty Level: Beginner to Intermediate (Botanical Line Art)
- Total Steps: 6 Construction Steps + Botanical Shading Guide
- Estimated Drawing Time: 15–20 minutes
- Recommended Supplies: 0.1mm & 0.3mm Fineliner Pens, 2H Sketching Pencil, Watercolor Paper
- Botanical Subject: Echinacea purpurea (Asteraceae family)
🎨 Interactive Draw-Along Studio: Realistic Coneflower (Echinacea)
Prefer practicing directly on your tablet, iPad, or computer screen? Draw along using our in-browser Interactive Draw-Along Studio! Toggle traceable reference lines, select curated color swatches, and download your finished artwork:
 Step Guide 🔍
Loading Step...
Loading instructions...


Switch to Another Flower
Pick any flower below to start a new step-by-step draw-along!
Step Guide

🎉 High Five, Artist!
Your custom botanical illustration is ready to download and share!

The 3 Structural Secrets of Coneflowers
Before putting pen to paper, understanding the three core architectural sections of a coneflower will prevent your drawing from looking flat or disjointed:
1. The Receptacle Cone
An upright, rounded egg dome composed of hundreds of miniature, prickly disk florets. In autumn, these harden into spiky seed heads that birds adore.
2. Reflexed Ray Petals
Unlike daisies that point outward horizontally, Echinacea petals are reflexed (drooping downward like a badminton shuttlecock), creating dramatic vertical presence.
3. Stiff Fibrous Stem
A sturdy, fibrous pedicel that connects directly to the center of the base rim, accompanied by lance-shaped leaves with parallel veining.
Step-by-Step Coneflower Drawing Guide
Step 1: Establish the Cone Armature & Radial Petal Guides
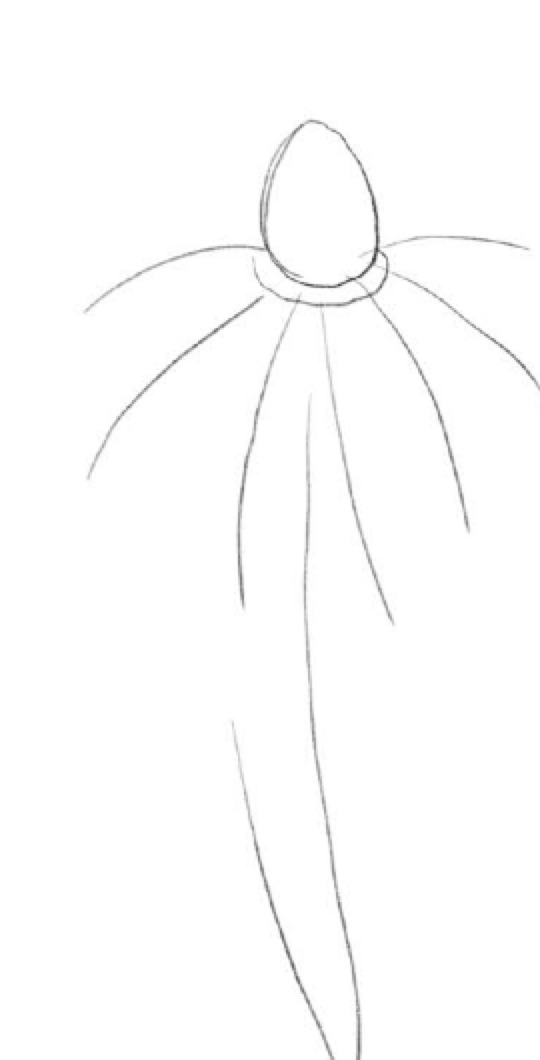
The secret to avoiding crooked or asymmetrical flowers is laying down a disciplined pencil foundation:
- The Center Cone: Lightly sketch an upright oval dome for the central seed cone. Draw a gently curving elliptical rim at its base to establish the petal anchor line.
- Radial Guide Spokes: Draw light, curving lines fanning downward from the base rim. Notice that petals on the sides flare outward, while petals facing the center drop almost straight down.
- Stem Trajectory: Sweep a single fluid curved line downward to position the flower stalk.
Step 2: Ink Foreground Ray Petals & Base Collar
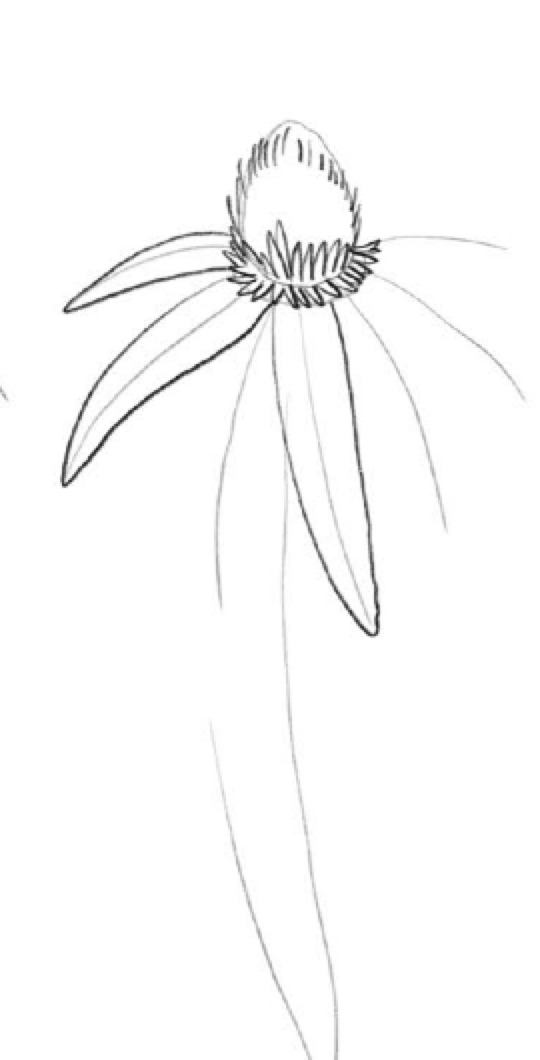
With your guidelines in place, begin inking the petals closest to the viewer:
- Foreground Petals: Follow your radial spokes. Taper each petal near the connection point at the cone, widen along the mid-blade, and finish with a soft blunt or notched tip.
- Natural Asymmetry: Allow subtle twists and variations in petal width—botanical beauty thrives on organic imperfection.
- Floret Collar: Along the bottom boundary of the cone, draw a jagged zigzag serration where the spiky cone florets meet the petal sockets.
Step 3: Layer Mid-Ground Petals & Spiny Cone Texture
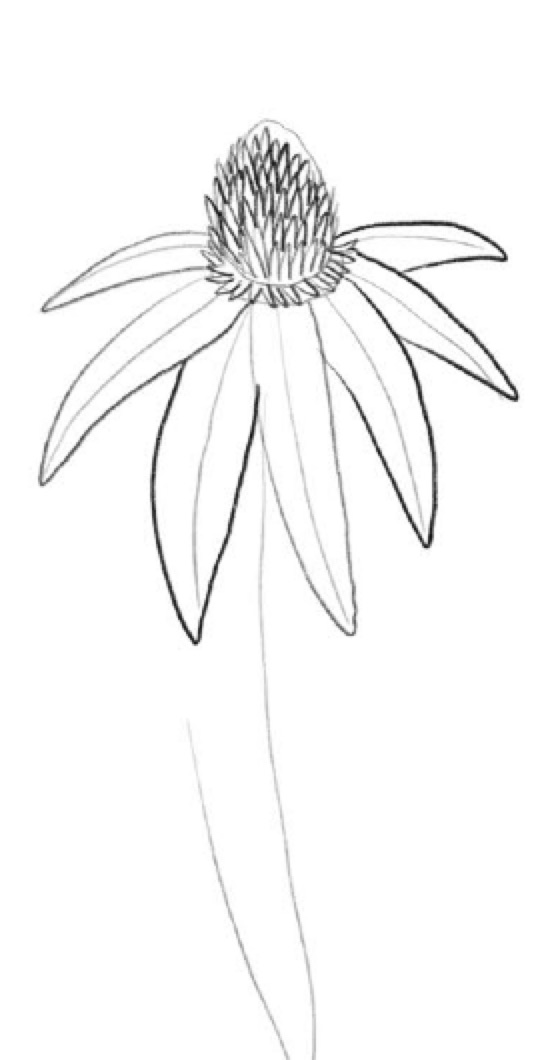
Depth in botanical art comes from overlapping planes:
- Intercalary Petals: Draw a second layer of petals tucked behind the foreground layer, filling the negative V-spaces.
- Building the Prickly Cone: Fill the central cone with compact, upward-pointing triangular bracts. Start along the bottom rim and work upward toward the peak.
- Floret Density: Make the spikes slightly smaller and more condensed near the summit of the cone.
Step 4: Background Petal Collar & Stem Contours
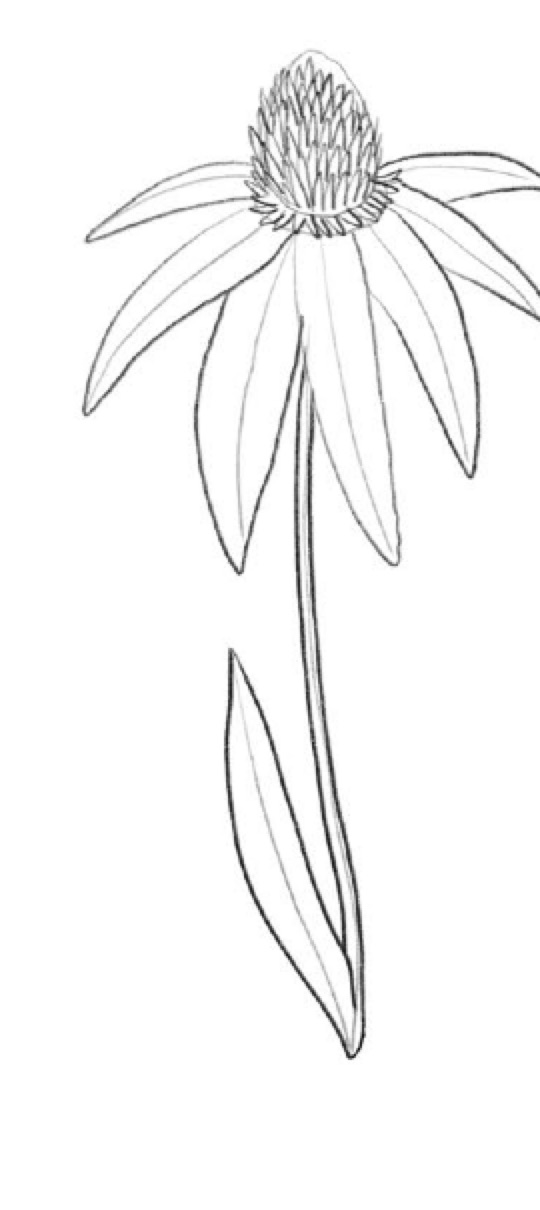
Complete the full 360-degree crown of petals:
- Far-Side Petal Tips: Sketch the tips of the petals originating from the far side of the receptacle dome. These complete the circular floral collar.
- Stem Structure: Thicken your stem guideline into two sturdy, parallel contours that can visually bear the weight of the dense seed head.
Step 5: Stem Alignment & Lanceolate Foliage
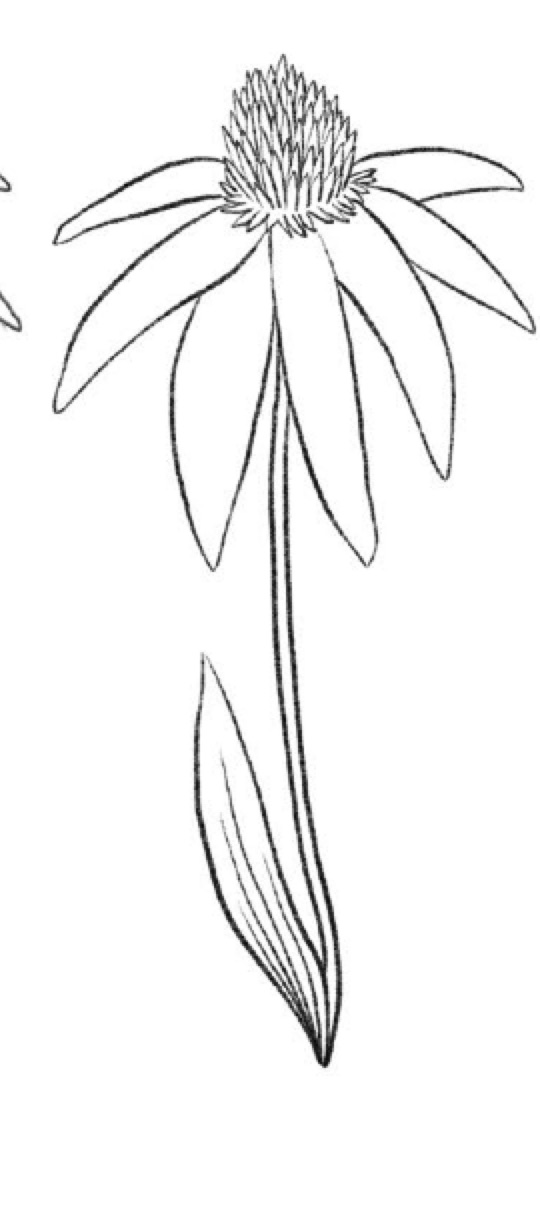
Ground your illustration with realistic plant foliage:
- Receptacle Anchor: Ensure the stem neck connects squarely beneath the center of the base collar.
- The Lanceolate Leaf: Draw a slender, upward-arching leaf clasping the lower section of the stem.
- Parallel Veins: Add sweeping longitudinal contour lines along the leaf blade to portray its fibrous botanical structure.
Step 6: Botanical Hatching, Petal Veining & Shading
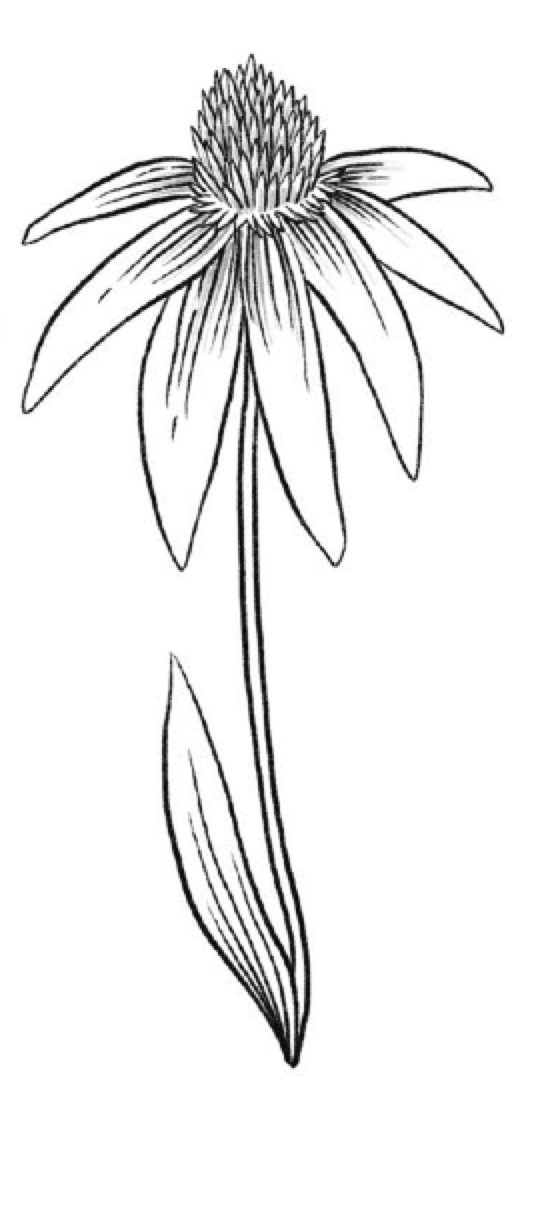
This final inking stage transforms your line drawing into a museum-quality botanical plate:
- Petal Striations: With an ultra-fine nib (0.1mm or 0.05mm), lay down delicate parallel hatch lines running along each petal. Concentrate the dense strokes at the top where petals emerge from the cone shadow.
- Disk Floret Detailing: Add fine stippling and short vertical flick marks across the center dome to accentuate the prickly seed florets.
- Stem & Leaf Shading: Shade the underside curve of the leaf and the right side of the stem to cement a consistent light source.
Pen Nib & Shading Technique Reference
| Flower Area | Recommended Nib | Shading Technique | Artistic Purpose |
|---|---|---|---|
| Central Seed Cone | 0.1mm / 0.2mm | Dense upward tooth marks & stippling | Portray prickly, seed-laden texture |
| Petal Striations | 0.05mm / 0.1mm | Delicate feathering from root to mid-blade | Convey paper-thin, fibrous petal blades |
| Stem Contours | 0.3mm / 0.5mm | Firm, continuous weighted lines | Establish structural rigidity & weight |
| Overlap Shadows | 0.2mm | Tightly spaced linear hatching | Create depth beneath tucked petals |
Botanical Watercolor Glazing Tips
If you’d like to add vibrant color over your waterproof pen outline (like our finished plate above), follow this 3-layer glazing sequence:
- Petal Wash (Layer 1): Lay down a transparent, diluted wash of Quinacridone Magenta or Rose Madder across the petals. Leave subtle slivers of white paper showing along the petal ridges to represent natural sunlight glints.
- The Center Cone (Layer 2): Wet the cone area and drop in warm Raw Sienna at the base, blending upward into rich Burnt Umber and fiery Burnt Orange at the spiky tips.
- Stem & Foliage (Layer 3): Paint the stem with crisp Sap Green mixed with a touch of Lemon Yellow for the sunlit highlights, deepening the shadow edge with Hooker’s Green.
Ready for your next botanical project? Discover how to draw Fibonacci seed spirals and radiant golden petals in our Realistic Sunflower Drawing Masterclass and master elegant chalice blooms in our Realistic Tulip Drawing Masterclass!
Looking for more floral and plant tutorials? Explore our growing collection of Flower Drawing Guides and test your skills in the CraftyTalks Drawing Studio!