10 Drawing Secrets from Japanese & Cartoon Illustrators (That Nobody Teaches Beginners)
If you have ever flipped through a professional illustrator’s sketchbook and wondered why their lines look so effortlessly breezy, confident, and full of life — while your own doodles feel a bit stiff, scratchy, and overworked — here is the most reassuring truth you will hear today: it is not a matter of “talent.”
Professional illustrators rarely teach the tiny physical habits and mindset shifts they use every single day in the studio. Acclaimed Japanese author Sachiko Umoto (Illustration School) and master character animator Keilidh Bradley (100 Cartoon Animals) do not rely on complex academic anatomy to create beloved characters. Instead, they lean on simple, practical secrets: razor-sharp eraser tricks, 2-minute nervous system warm-ups, and the magic of implied textures.
Grab a cup of warm tea, open your favorite sketchbook, and let’s explore the 10 illustrator secrets that will immediately transform your beginner drawings.
1. The Scrap Paper Warm-Up Drill (Calibrate Your Hand First)
Most beginners sit down at their desk, open their prized sketchbook, and immediately try to draw a perfect character on blank paper. Within 30 seconds, their hand feels stiff, the pencil shakes, and self-doubt creeps in.
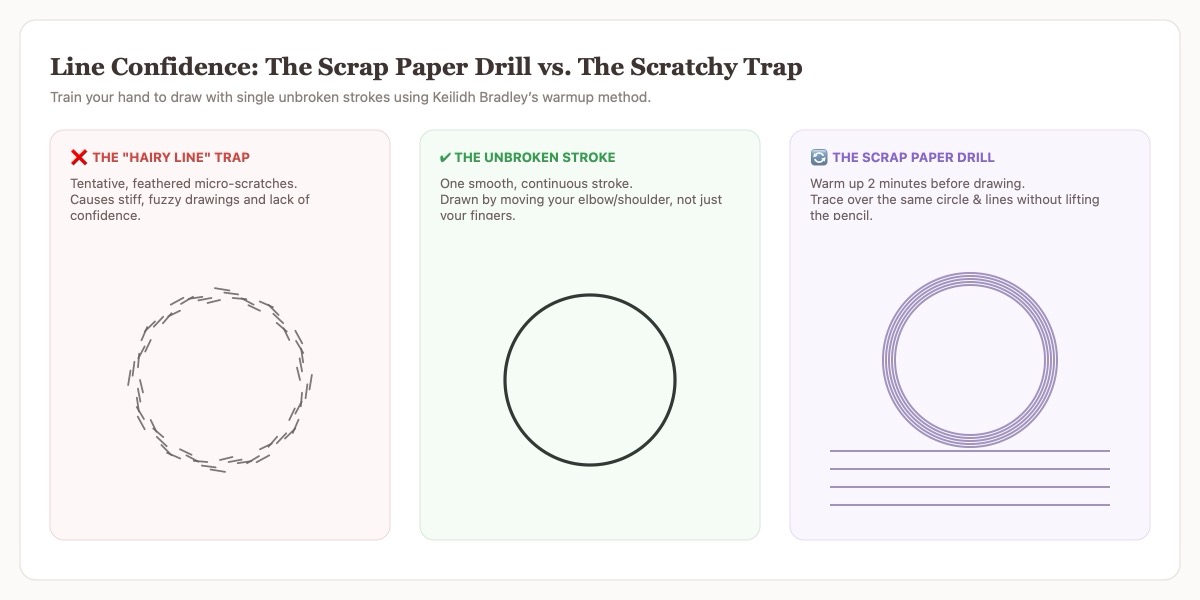
Illustrator Keilidh Bradley recommends never touching your main drawing without a 2-minute scrap paper drill. Take a rough piece of scrap paper or the back of an old envelope. Draw continuous concentric circles and long parallel straight lines over and over without lifting your pencil off the paper. This wakes up the fine motor muscles in your hand, loosens your wrist, and removes the psychological pressure of perfection before you start your real artwork.
2. Banish the “Hairy Line” Trap (Economy of Line)
The single biggest tell of a beginner sketch is what artists call the “hairy line” — drawing a curve with dozens of tiny, tentative, overlapping micro-scratches. It happens because we are afraid of committing to one decisive line.
Top illustrators preach economy of line: depicting each feature in as few unbroken strokes as possible. The secret to drawing smooth, decisive strokes is where you pivot from. Do not lock your wrist and draw with only your fingertips; instead, lock your fingers gently and pivot from your elbow or shoulder. You will immediately feel your lines glide across the page with clean, swooping confidence.
3. The Line Weight Hierarchy (Thick Contours vs. Whispering Details)
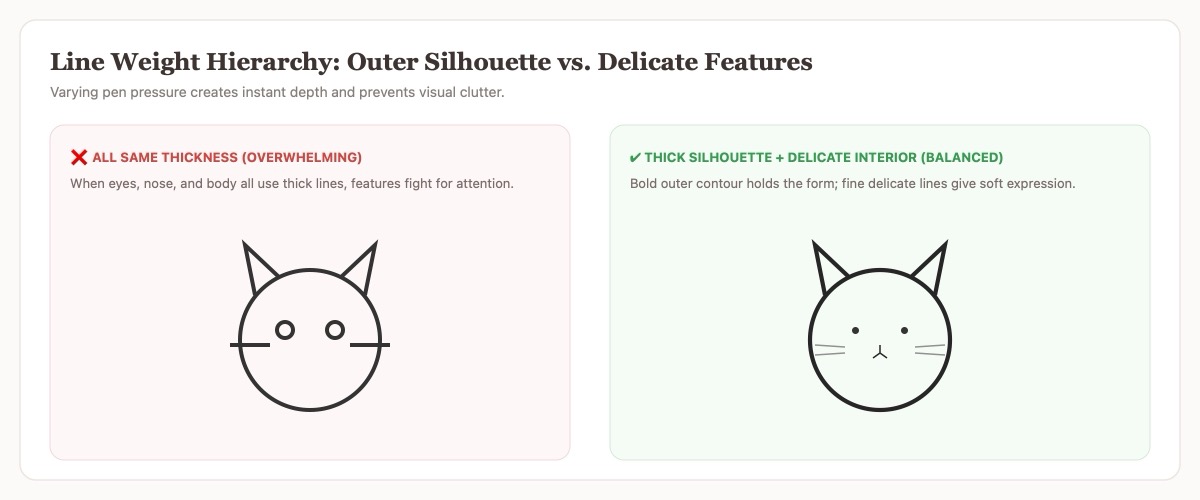
Have you ever finished an animal sketch and felt like it looked like a wire fence — loud, flat, and busy? The culprit is almost always uniform line thickness.
In professional illustration, lines follow a clear hierarchy:
- Outer Silhouette (3px – 4px bold): The overall body and head contour get a stronger, heavier line to establish presence and ground the character.
- Inner Details (1px – 1.5px delicate): Eyes, nose, smile, whiskers, and paw pads get lighter, softer pressure.
This contrast keeps the viewer’s eye from getting overwhelmed and gives instant 3D depth to a simple 2D drawing.
4. The Craft-Knife Eraser Hack (Sachiko Umoto’s Secret)
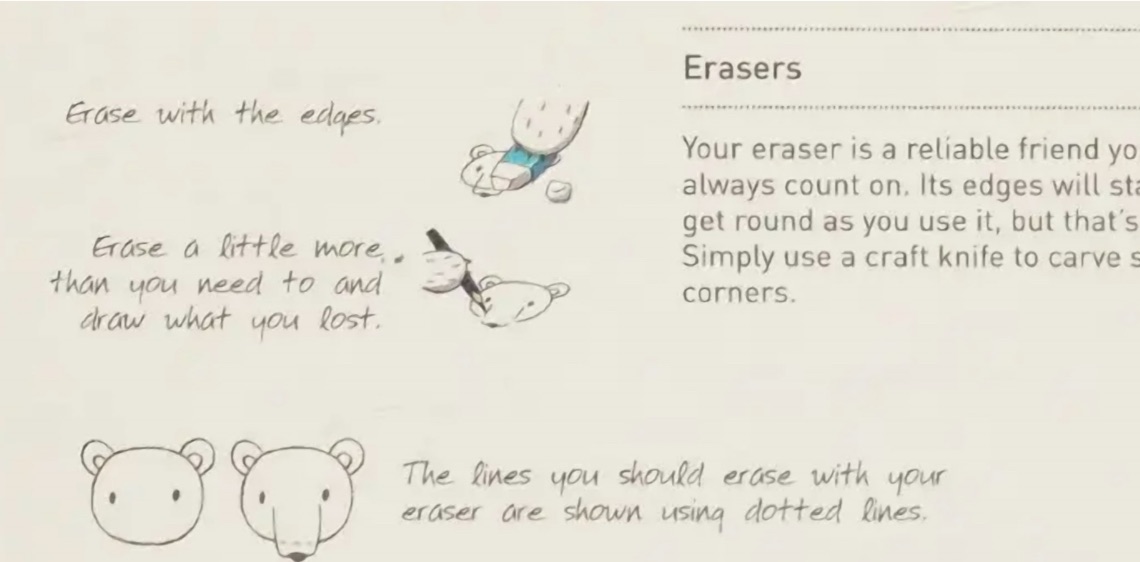
In her world-renowned book Illustration School: Let’s Draw Cute Animals, Japanese artist Sachiko Umoto calls the eraser an artist’s most reliable friend. But standard block erasers have a fatal flaw: within a week of use, all four corners become rounded, mushy bumps.
When you try to erase a tiny overlapping construction line inside a cat’s ear with a rounded eraser, you end up wiping out the head, ear, and eye all at once! Umoto’s studio hack: use a craft knife to slice off a thin diagonal corner of your eraser. This creates a brand-new, razor-sharp 90-degree corner that gives you microscopic accuracy without needing expensive electric erasers.
5. “Erase More Than You Need, Then Redraw Cleanly”
Another brilliant insight from Sachiko Umoto is about how to erase mistakes. When beginners make a tiny crooked line where the head meets the neck, they try to rub a tiny 2-millimeter spot back and forth. The result? A greasy gray graphite smudge that ruins the paper grain.
Instead, erase slightly more than you need to. Clean the entire corner intersection away until the paper is fresh and white. Then, take a breath and redraw the missing segment in one continuous, confident stroke. The drawing will look 100% intentional and clean.
6. Straights Against Curves (Dynamic Visual Rhythm)
Why do some cartoon animals look stiff like cardboard boxes, while others look floppy like noodles? The answer lies in character design master principle: Straights vs. Curves.
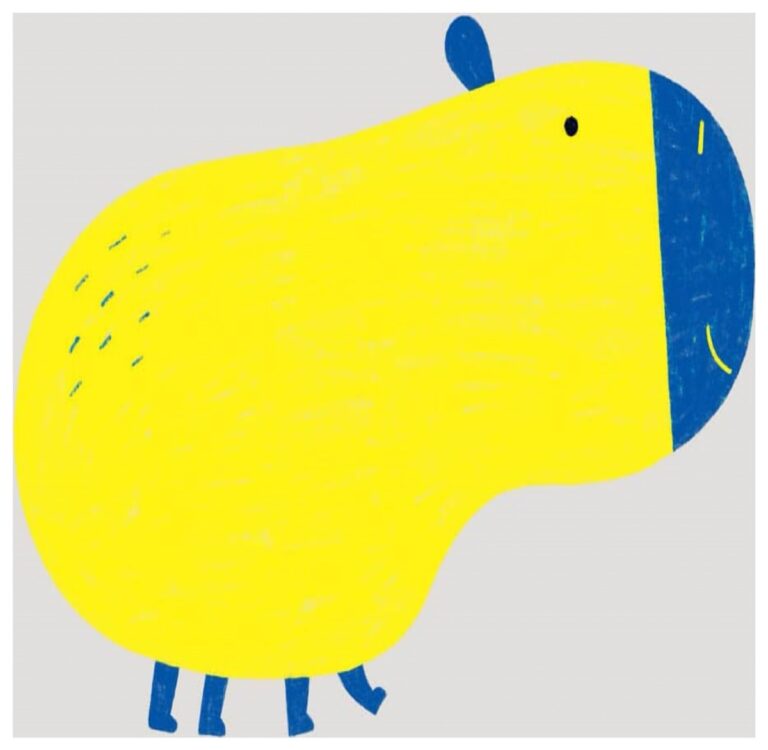
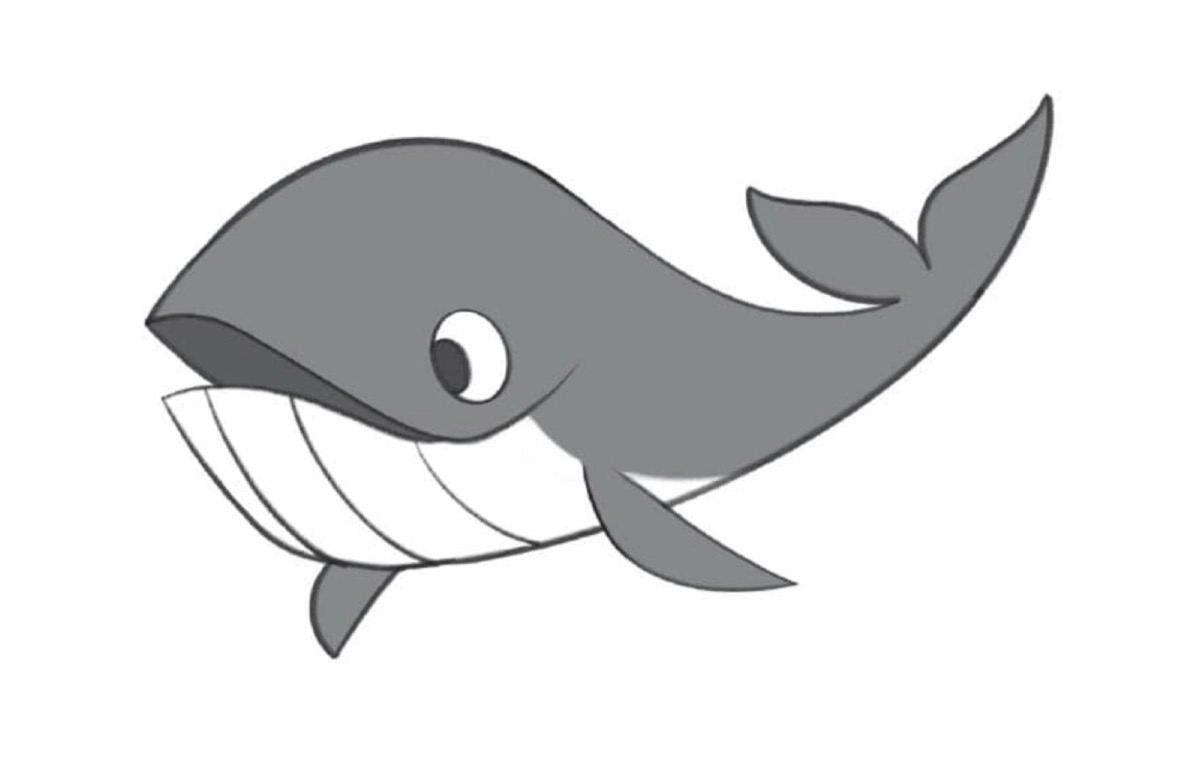
Keilidh Bradley explains that pairing a structural straight edge against an organic swooping curve creates visual contrast and rhythm. Look at the Blue Whale below: the underside where there are fewer details is simplified to a mostly straight, structured line, contrasting with the dramatic sweeping curve of the back and forehead. This rhythm leads the viewer’s eye naturally across the character.
7. Implied Details (Don’t Draw Every Hair!)
When drawing a fluffy cat, puppy, or bird, beginners often fall into the “Texture Trap”: they try to draw every single strand of fur or individual feather. In cartoon and Japanese illustration, drawing all the fur makes the animal look chaotic, hairy, and dirty.
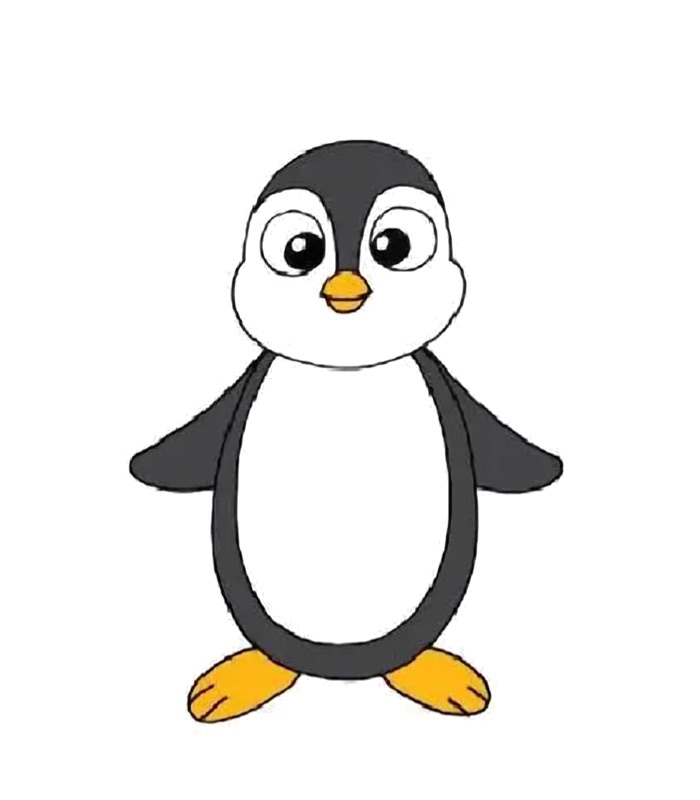
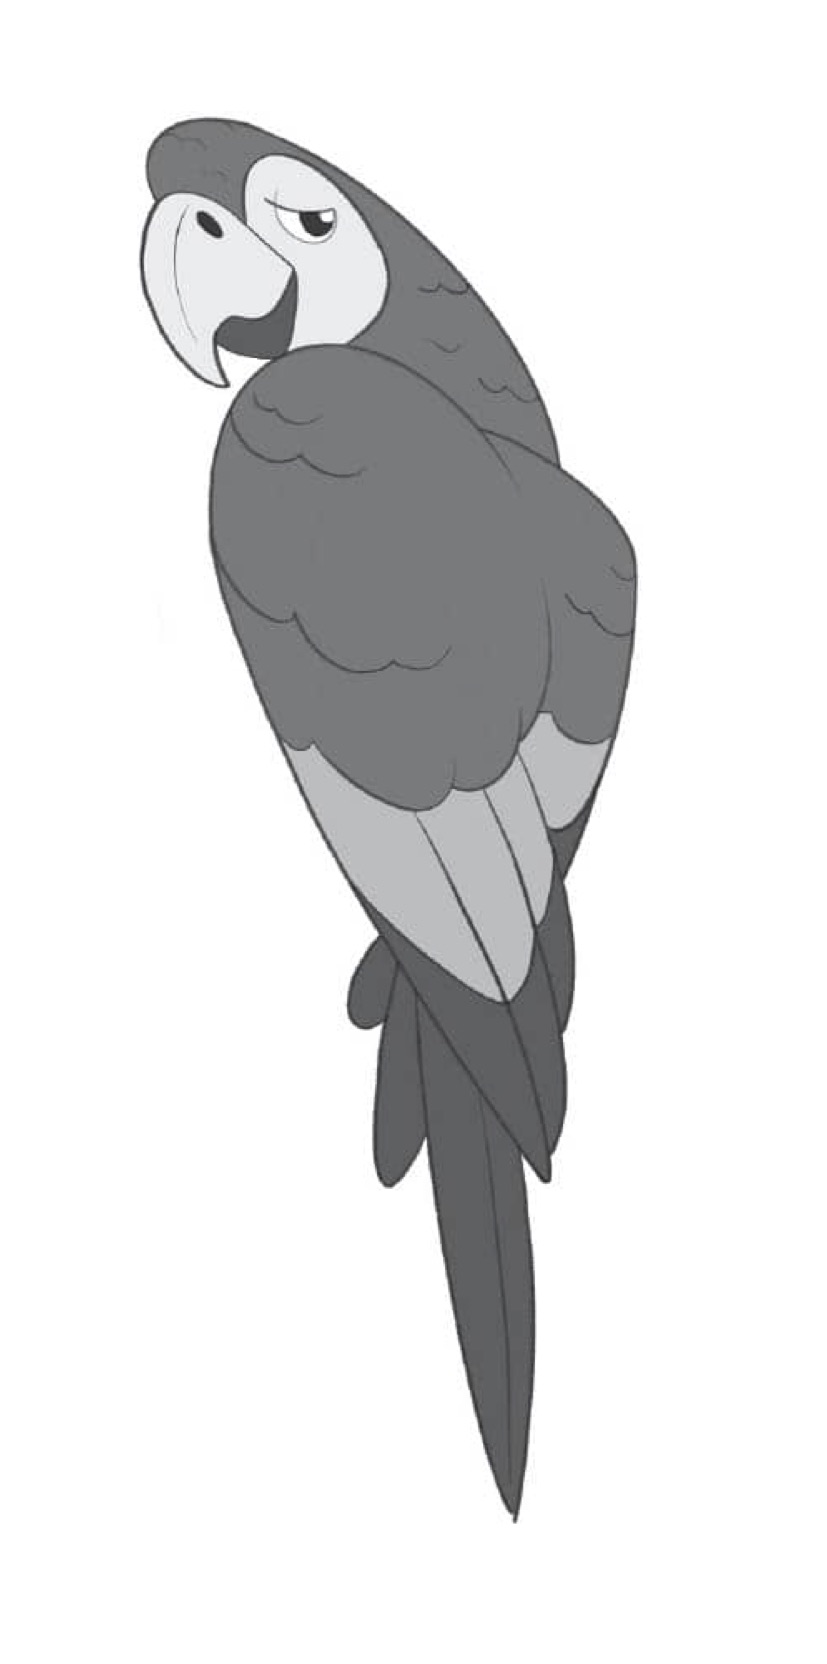
In Bradley’s 100 Cartoon Animals, he demonstrates implied texture. On dense-feathered birds like penguins, he only draws clean outlines with zero interior feather marks. On a macaw with large feathers, he suggests texture with just two or three gentle curved lines on the neck and wing contour. The human brain is incredible — give it two zigzag tufts on a cheek, and it automatically reads the entire animal as fluffy.
8. The 6 Kawaii Micro-Expressions Formula
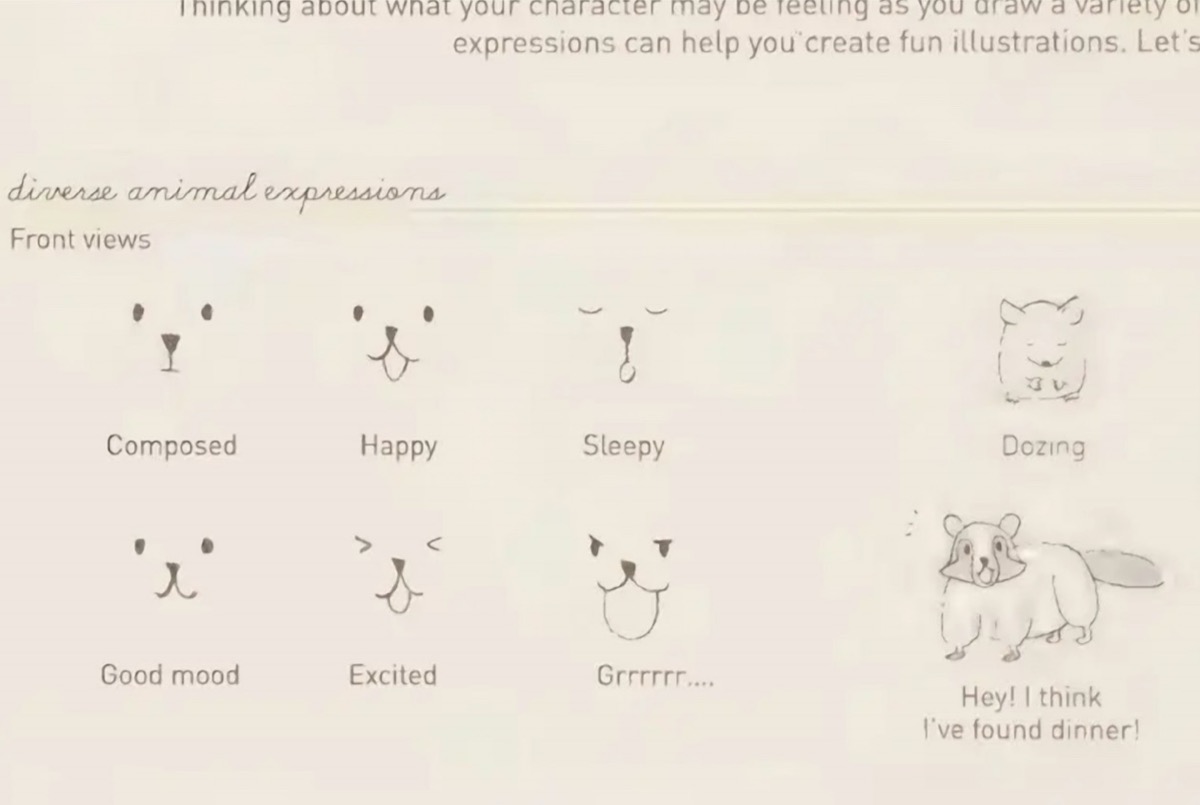
You don’t need detailed teeth, realistic irises, or complicated brows to give your characters soul. In fact, the cutest Japanese animal illustrations rely on micro-shifts between simple dots and curves.
Sachiko Umoto breaks down the 6 essential expressions:
- Composed / Calm: Two widely spaced dot eyes with a small inverted triangle nose.
- Happy: Dot eyes + open curved mouth with a cute tongue (
👅). - Sleepy / Relaxed: Soft downward curved eyelids (
⌒ ⌒) with a tiny dot nose. - Good Mood: Raised dot eyes with an upturned “cat-muzzle” (
ω). - Excited: Pinched wedge eyes (
> <) with an energetic open mouth. - Cheeky / Grrrrr: Angled triangular brows with a tiny confident sneer.
9. Storytelling Accessories (Instant Character Narrative)
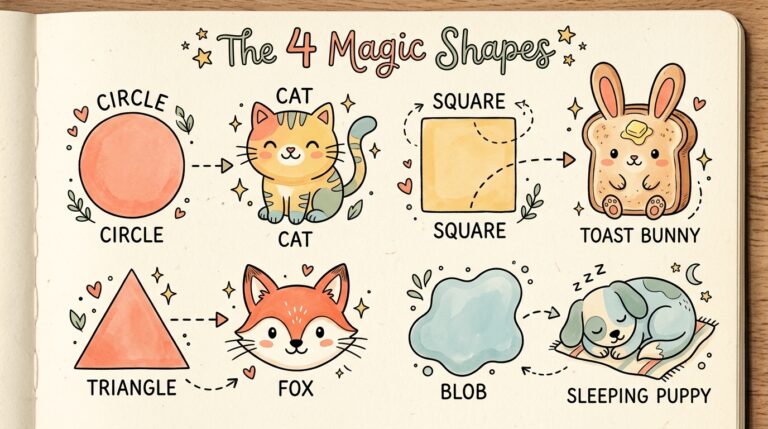
In her hit book Draw 62 Animals and Make Them Cute, illustrator Heegyum Kim reveals one of the most delightful secrets of character art: a simple geometric drawing becomes instantly unforgettable the moment you add a narrative accessory.
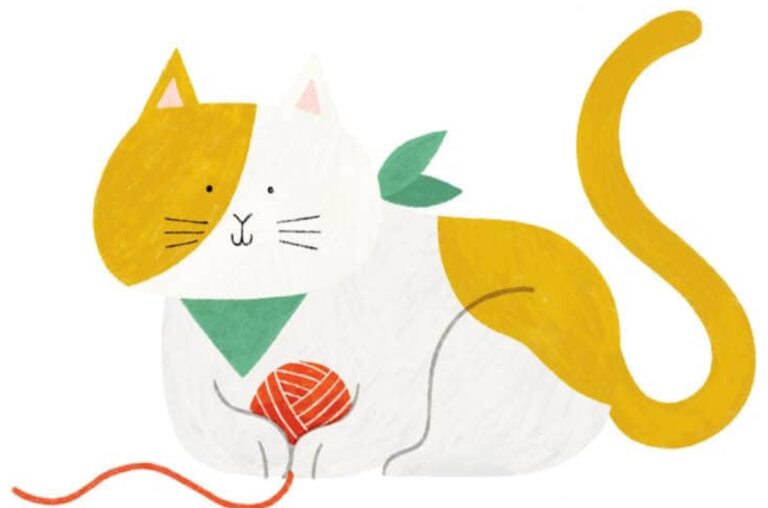
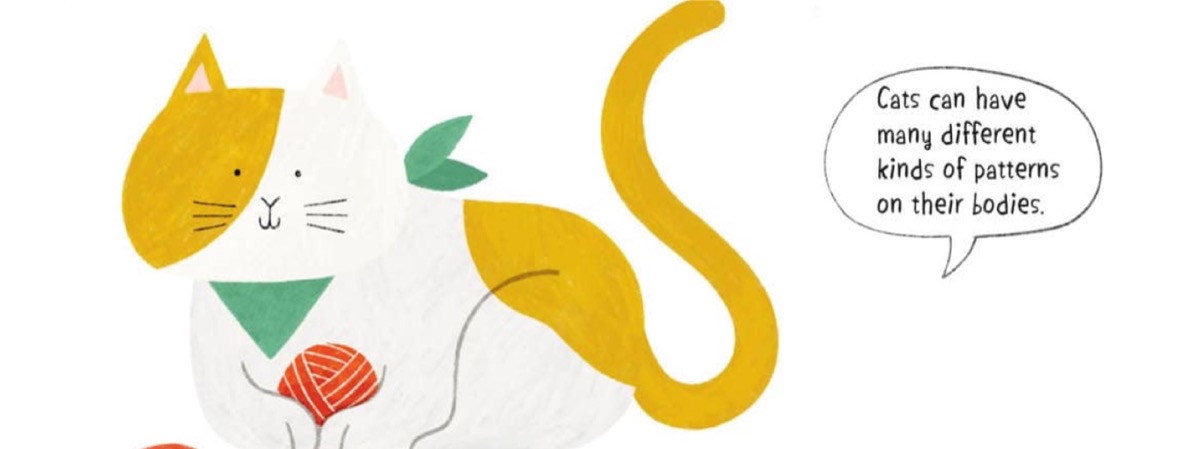
A basic circle cat is cute. But give that cat a tiny knotted green bandana, a curled tail, and a bright red ball of yarn, and suddenly it is no longer just a drawing — it is a character with a cozy life, a favorite toy, and a story. Try adding a daisy tucked behind a puppy’s ear, a steaming cup of tea next to a bear, or a little knitted scarf on a chilly penguin.
10. The “White Space” Coloring Rule
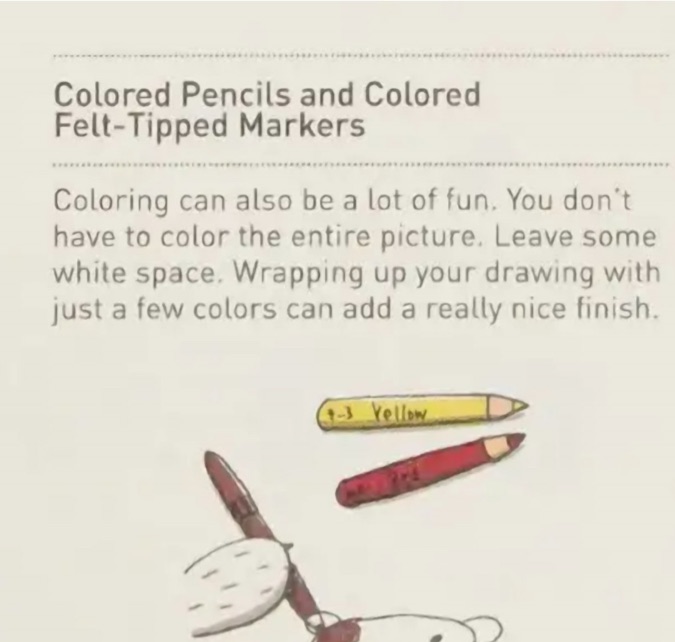
When beginners pick up colored pencils or markers, they often feel pressured to color their drawing edge-to-edge with 100% heavy opacity, like filling out a commercial coloring book. But this often suffocates the linework and makes the sketch look flat and muddy.
Sachiko Umoto emphasizes the beauty of negative white space. When coloring with colored pencils or soft markers: “You don’t have to color the entire picture. Leave some white space. Wrapping up your drawing with just a few colors can add a really nice finish.” Leaving soft uncolored paper highlights on the animal’s tummy, cheeks, or back makes the drawing breathe with lightness, freshness, and authentic sketchbook warmth.
🎨 Ready to Put These Secrets into Practice?
Now that you have learned the warm-up drill, the craft-knife eraser trick, and the power of line weight, you have everything you need to start drawing with total confidence!