How to Draw a Realistic Rose (Rosa) in 6 Easy Steps
Few flowers carry the timeless romance and poetic elegance of the garden rose (Rosa). With its velvety spiraling petals, delicate fragrance, and serrated emerald foliage, the rose has captivated botanical illustrators for centuries. While drawing a blooming rose can seem daunting to beginners due to its layered complexity, breaking the bloom into structured circular armatures and progressive petal cups transforms it into a relaxing, deeply rewarding creative experience.
In this comprehensive beginner-friendly botanical tutorial, you will discover how to draw a realistic blooming rose in 6 easy steps. Whether you are sketching in a field journal, experimenting with fine inking pens, or using our interactive Draw-Along Studio below to practice on screen, you will master the geometric secrets that give garden roses their lifelike depth and graceful posture.
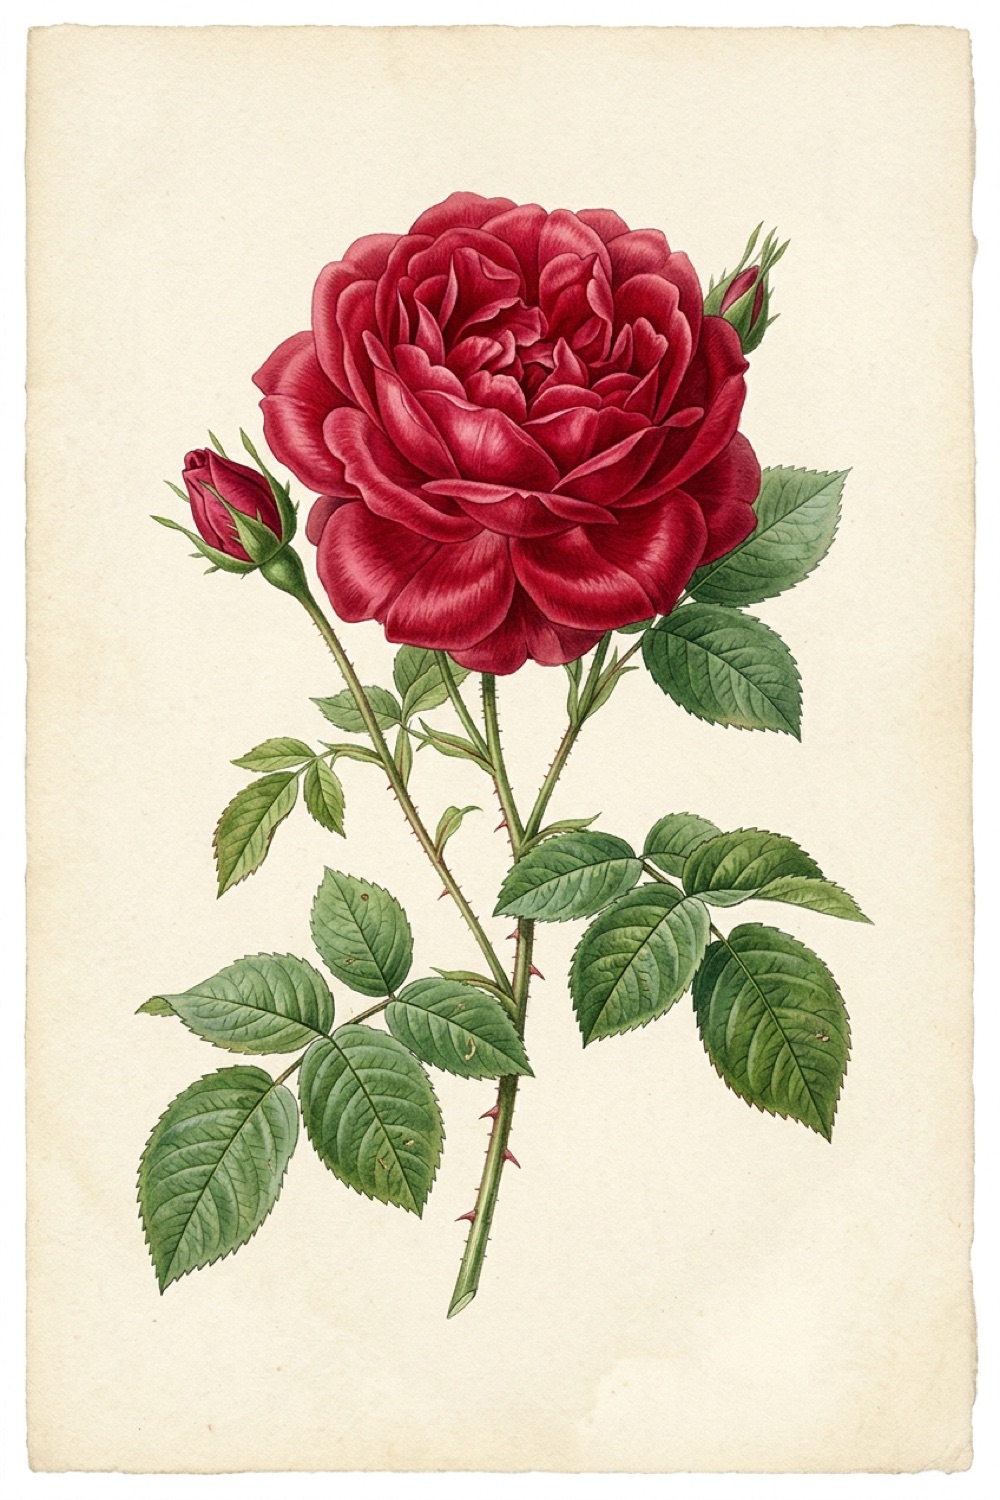
Botanical Anatomy: The Secret to Drawing Convincing Roses
Before putting pencil to paper, understanding how a rose bloom is constructed will immediately improve your drawing accuracy:
- The Central Spiral (Corolla Core): At the heart of every rose bloom is a tightly unfurling spiral of juvenile petals. As the rose opens, these inner petals remain cup-shaped while outer petals bend outward and downward.
- Fibonacci Petal Arrangement: Rose petals do not grow randomly in flat circles; they follow mathematical phyllotaxis where each consecutive petal layer offsets and tucks beneath the previous one.
- Pinnate Serrated Foliage: Rose leaves feature distinct oval leaflets arranged along a central petiole, characterized by sharp, finely toothed (serrated) edges and graceful arching secondary veins.
- Protective Sepals: Beneath the bloom, narrow pointed green sepals reach upward to cradle the blossom cup, adding charming wild botanical character to your composition.
Recommended Drawing Materials
You do not need an expensive art studio to create museum-worthy botanical drawings. Here are the simple supplies we recommend:
- Pencils: A hard 2H or HB graphite pencil for light foundational guidelines, and a softer 2B pencil for rich shadows.
- Inking Pens: Archival pigment fineliners (such as Sakura Pigma Micron or Faber-Castell Pitt Artist Pens in sizes 0.1mm, 0.3mm, and 0.5mm).
- Eraser: A kneaded eraser to gently lift graphite guidelines without scuffing paper fibers.
- Paper: Smooth Bristol board or heavy 200–300 gsm watercolor paper that holds crisp ink lines without feathering.
🎨 Interactive Draw-Along Studio: Realistic Blooming Rose
Prefer practicing directly on your tablet, iPad, or computer screen? Draw along using our in-browser Interactive Draw-Along Studio! Toggle traceable reference lines, select curated color swatches, and download your finished artwork:
 Step Guide 🔍
Loading Step...
Loading instructions...


Switch to Another Flower
Pick any flower below to start a new step-by-step draw-along!
Step Guide

🎉 High Five, Artist!
Your custom botanical illustration is ready to download and share!

Step-by-Step Rose Drawing Instructions
Step 1: Sketch the Circular Armature & Leaf Axis Lines
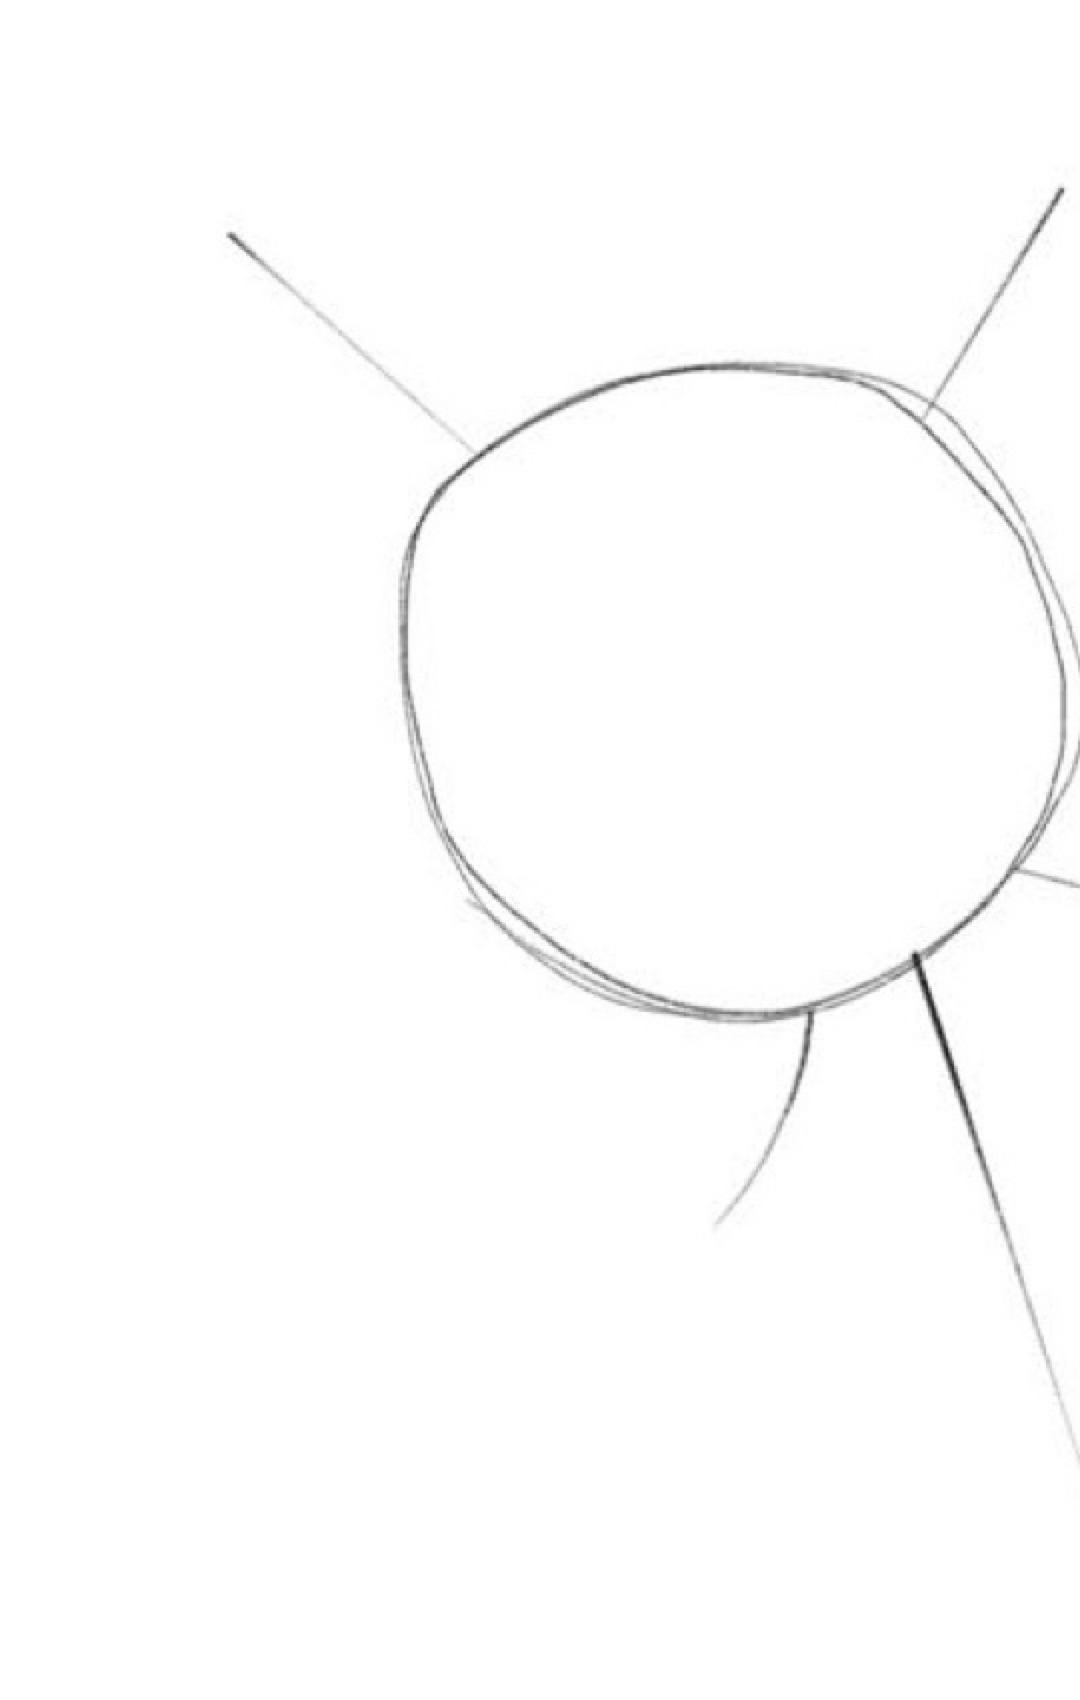
Begin by sketching a soft circular dome with your 2H pencil. This circle establishes the overall volume and outer boundaries of your rose bloom, preventing petals from sprawling unevenly. Next, drop four straight radiating gesture lines extending outward from the perimeter. These lines establish the natural growth trajectory for your upcoming rose leaves and sepals.
Step 2: Draw the Central Spiraling Bud & Inner Petal Cups
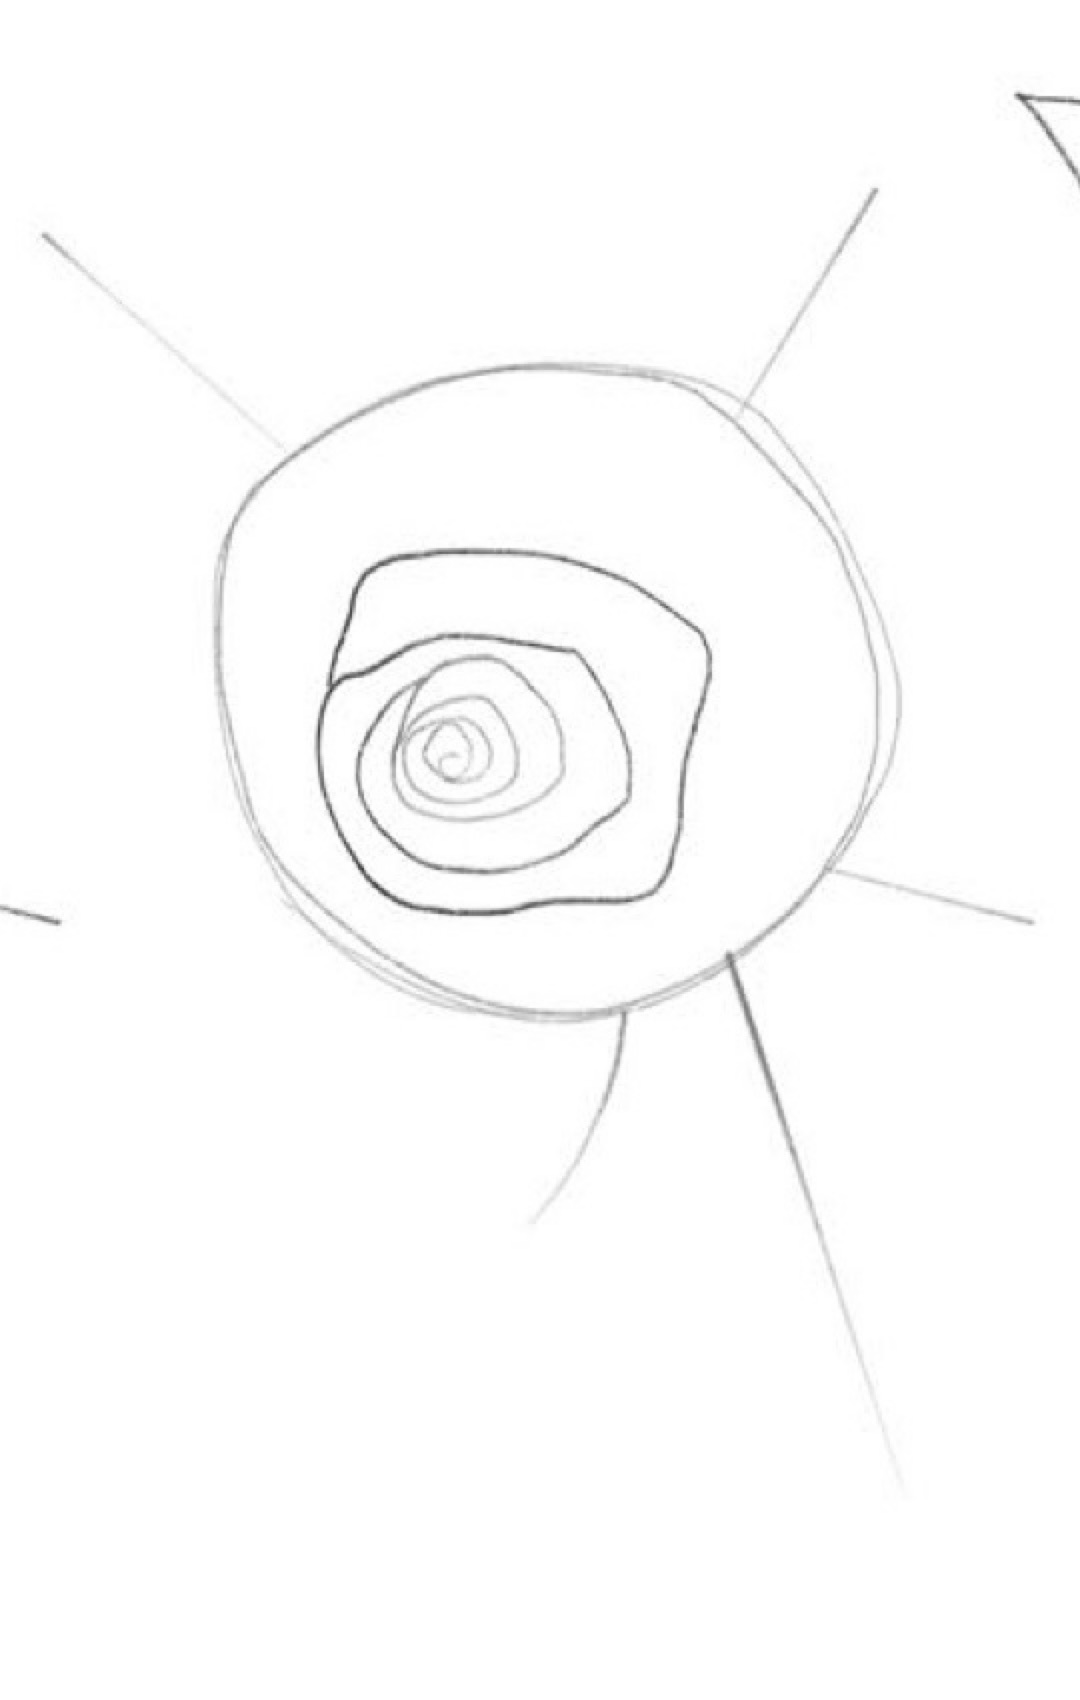
Just slightly off-center inside the circle, sketch a tight spiral gesture resembling a tiny nautilus shell or cinnamon roll. This represents the central cone where the newest petals remain tightly clustered. Next, wrap two overlapping curved petal cups around the spiral. Keep the contours soft and organic, allowing the tops of the petals to curve gently inward.
Step 3: Expand with Layered Petal Cups & Ovate Leaf Silhouettes
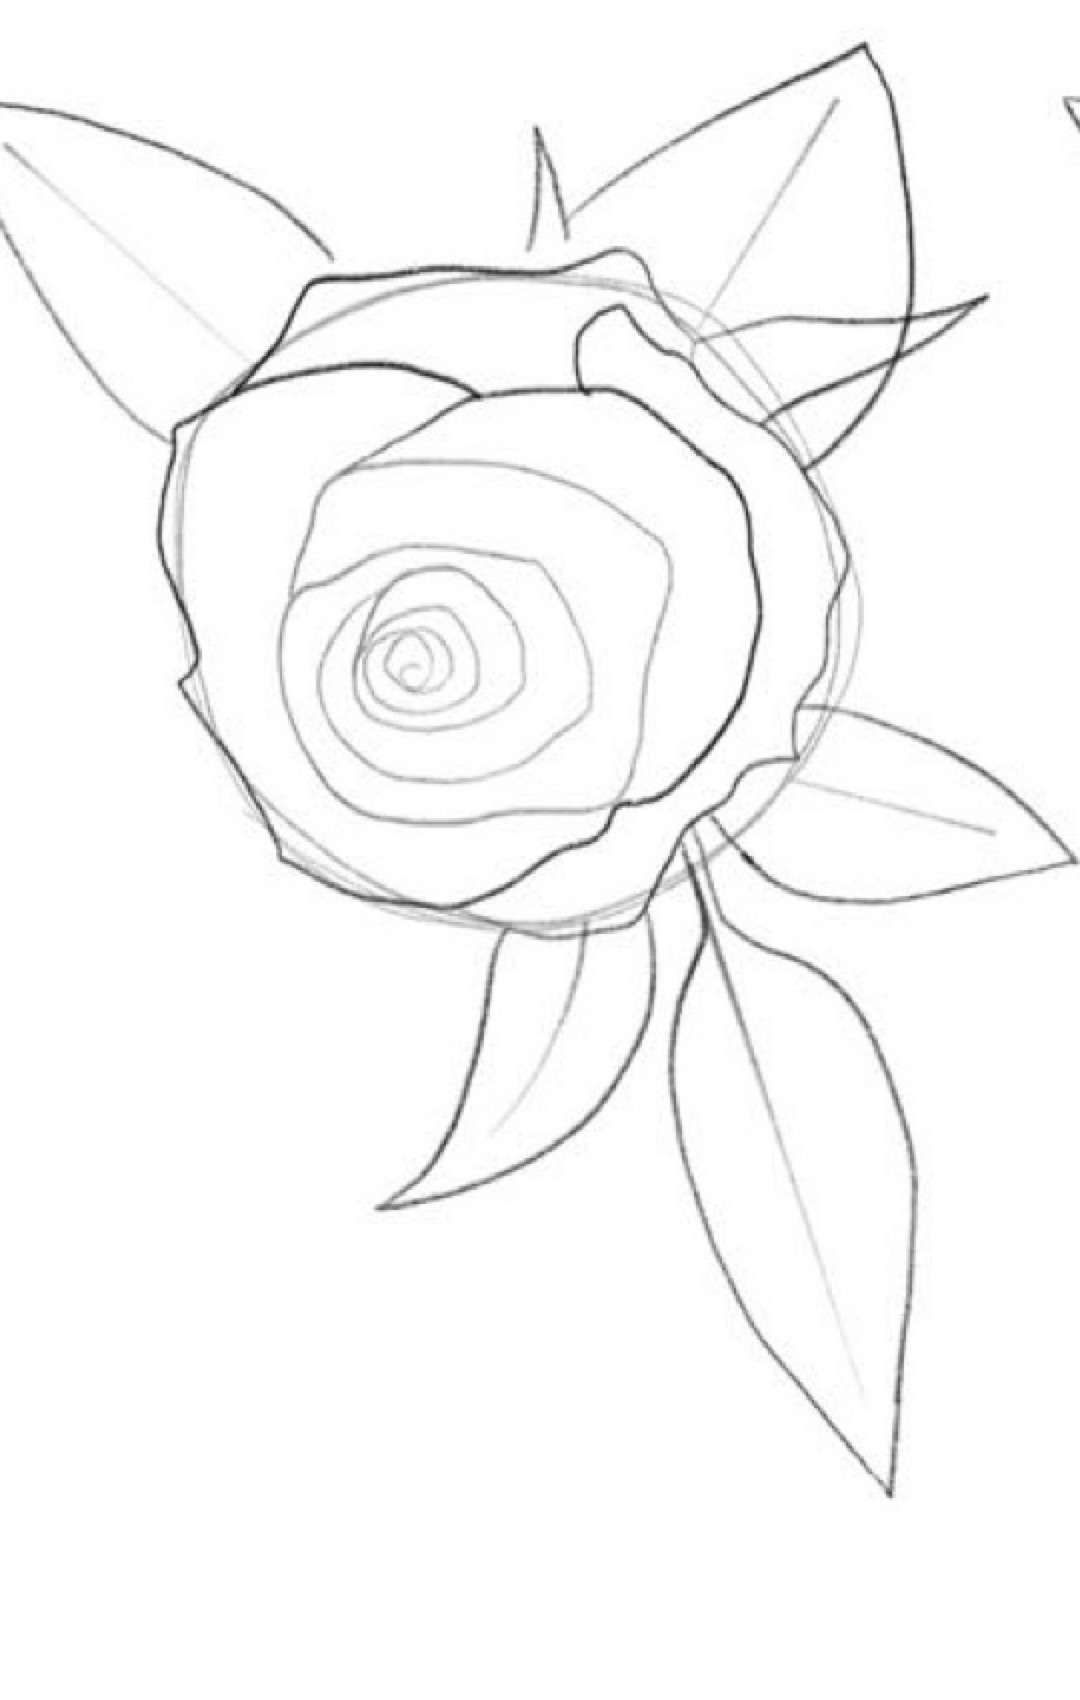
Build outward by adding concentric petal cups that alternate in position, cradling the inner bud like gentle curved hands. Each layer should be slightly looser and larger than the one before it. Along your radiating guide lines, sketch smooth teardrop leaf silhouettes to establish where the supporting foliage will frame the blossom.
Step 4: Define Outer Petal Folds & Serrated Leaf Margins
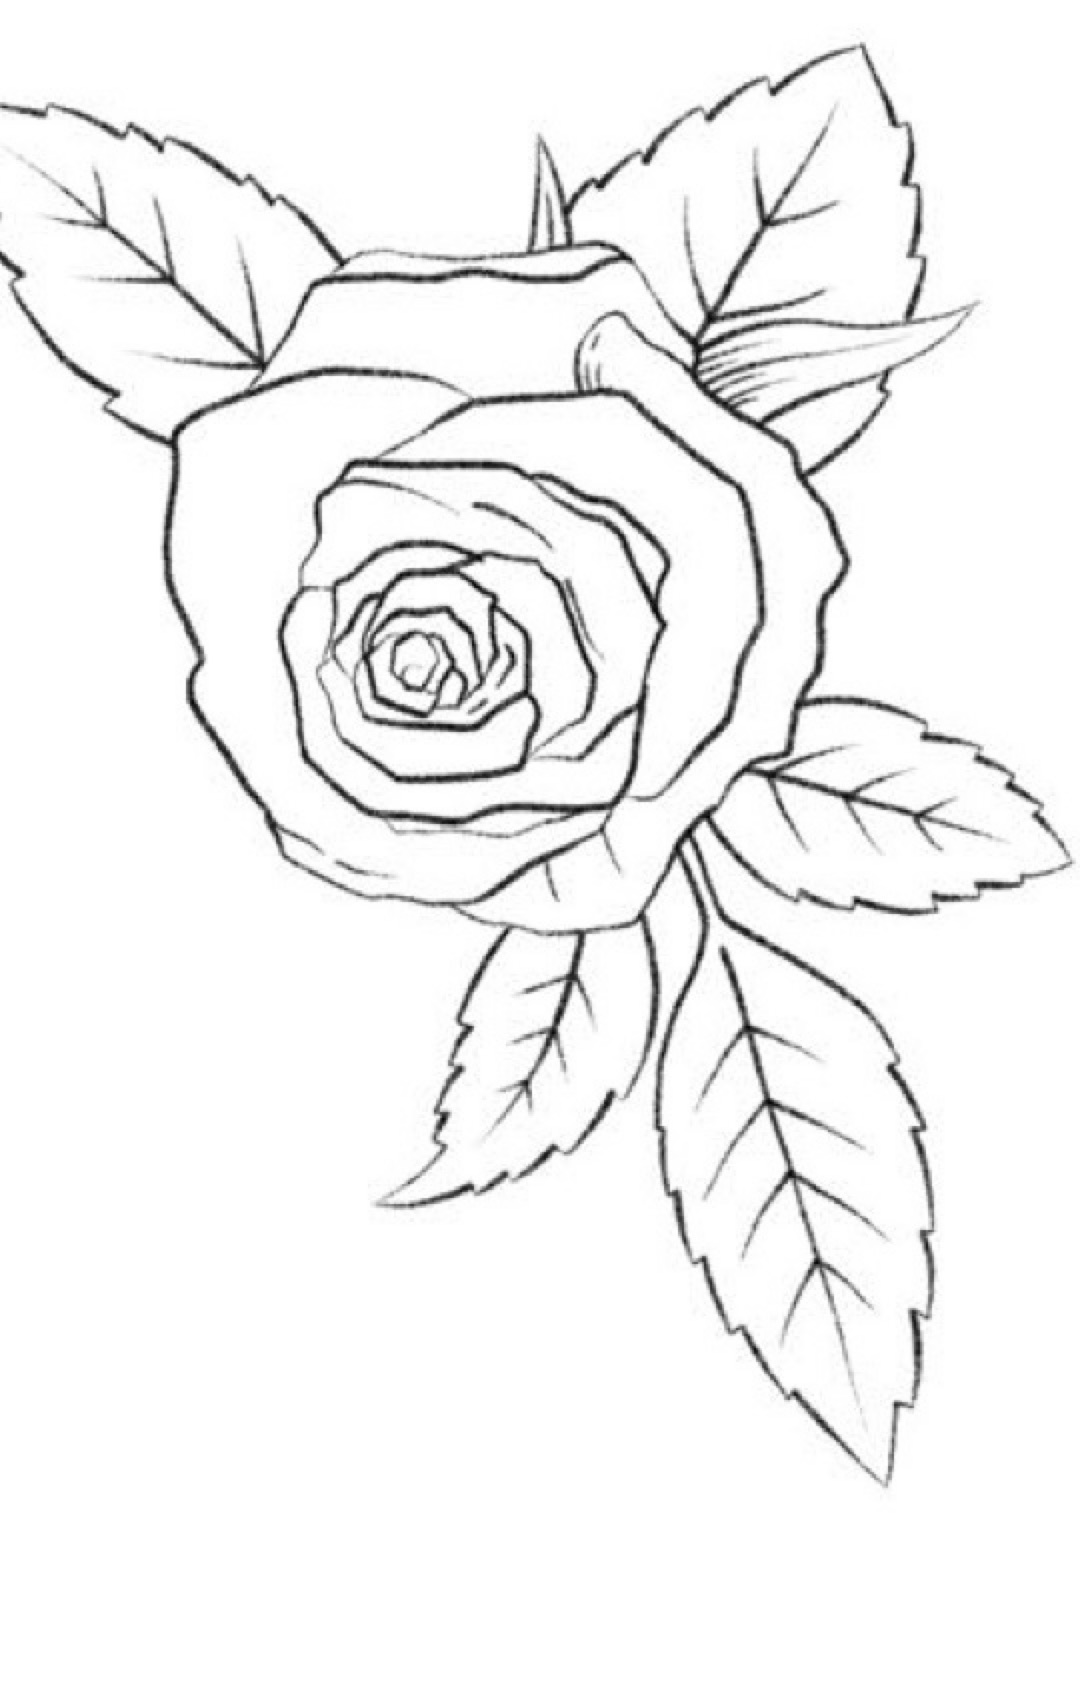
As rose petals mature, their tips curl backward. Add small downward-turned triangular folds along the rims of the outer petals to create this realistic botanical effect. Then, refine your leaves by replacing smooth outlines with crisp, finely serrated toothed margins. Don’t forget to add a couple of slender, pointed sepals peeking between the petals!
Step 5: Ink Crisp Contours & Detailed Leaf Midribs
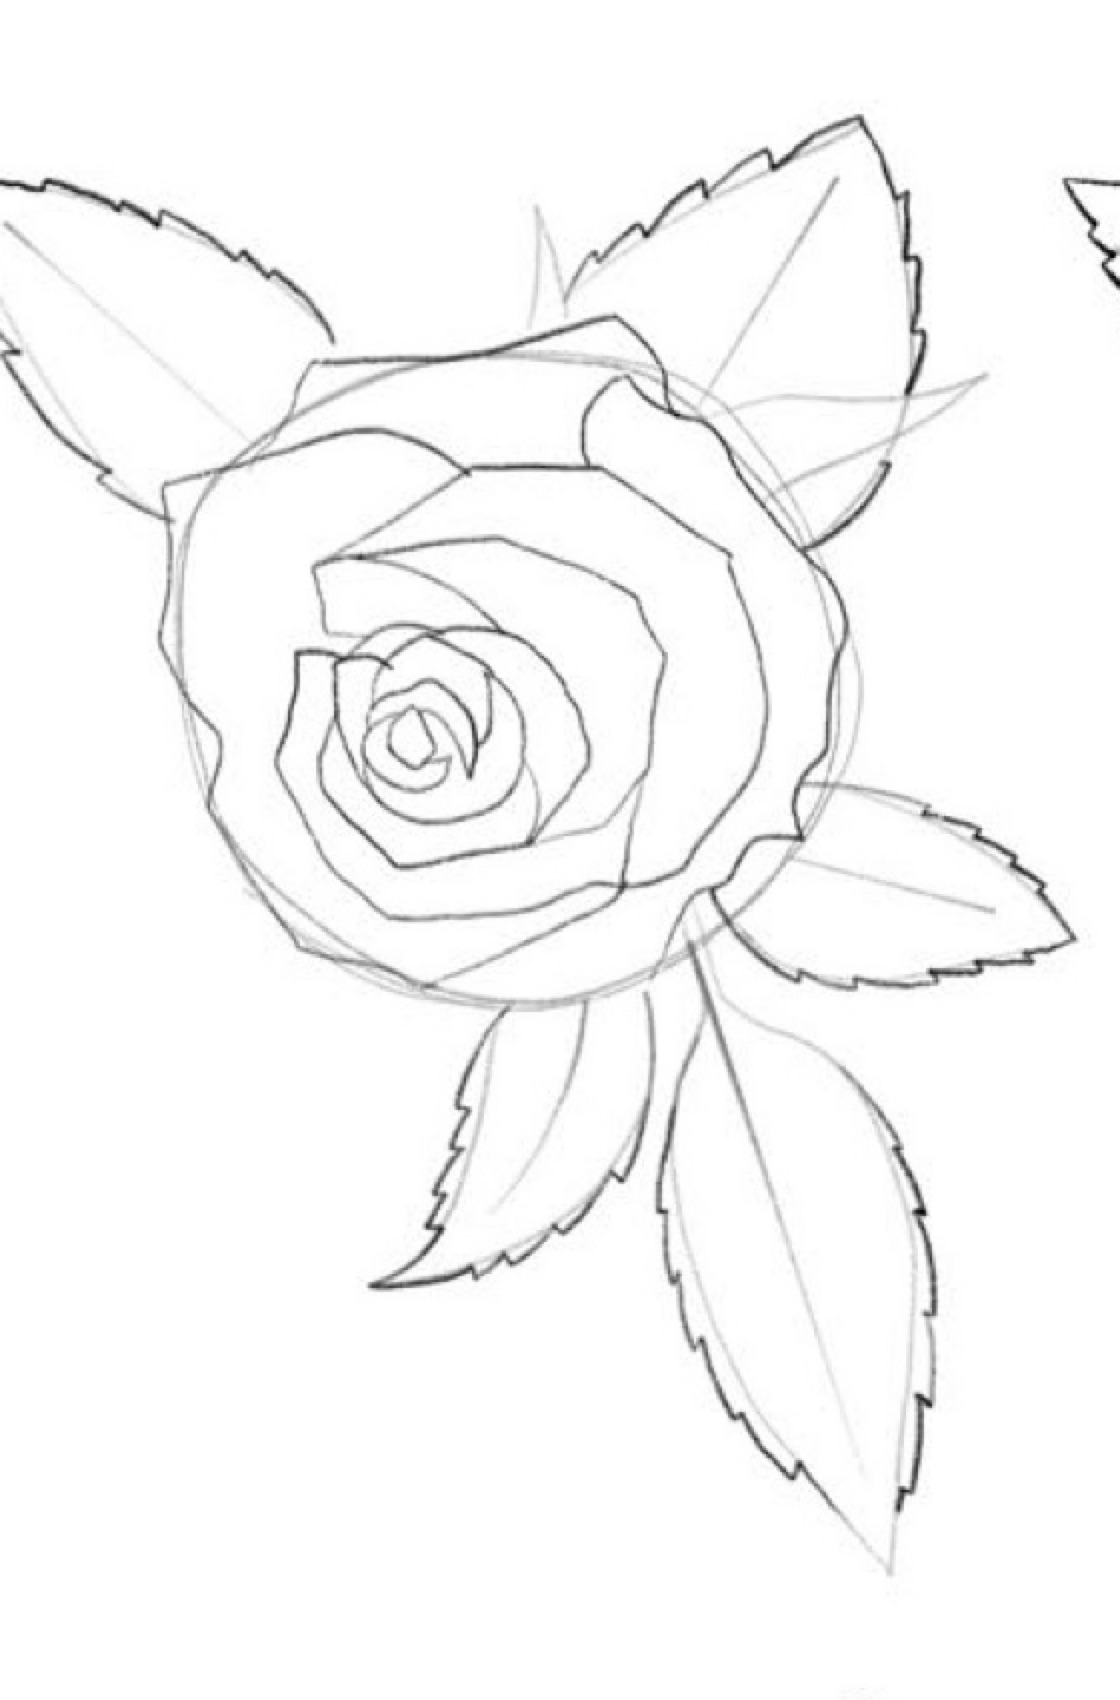
Switch to your 0.3mm archival fineliner pen. Trace confident, expressive ink strokes over your refined contours. Vary your line weight: apply gentle pressure along the deep crevices under overlapping petals, and use a lighter touch on illuminated upper edges. On each leaf, draw a central midrib and add delicate secondary veins arching toward the leaf tips.
Step 6: Master Botanical Cross-Hatching & Petal Shading
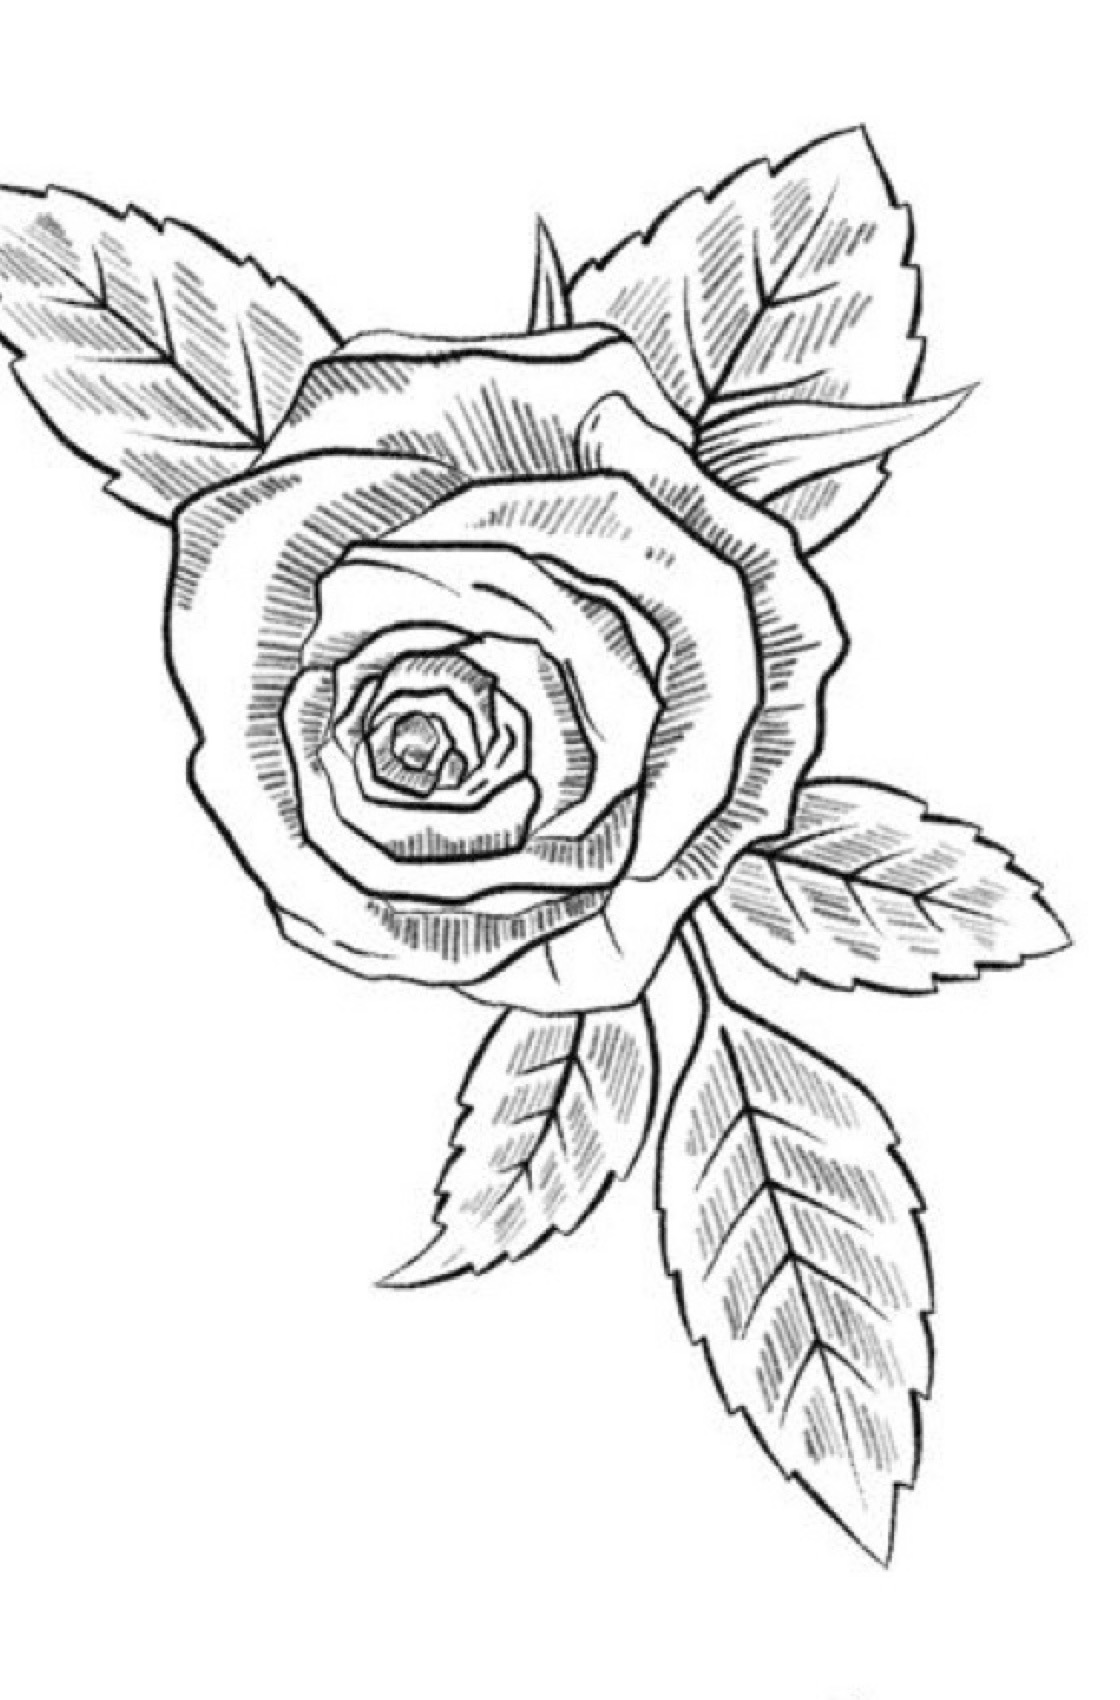
Bring your rose to life with delicate botanical shading! Using a fine 0.1mm pen or a sharp 2B pencil, apply gentle parallel hatching lines inside the deep crevices between petals and underneath downward-turned petal lips. Always curve your shading lines to match the natural curvature of each petal. Shade the leaves with fine directional strokes following the angle of the veins, leaving a subtle highlight band along the central vein ridge.
Pro Artist Tips for Drawing Masterpiece Roses
- Avoid Perfect Symmetry: In nature, no two rose petals are identical. Giving some petals subtle chips, curls, or slightly asymmetrical folds makes your drawing look authentic rather than manufactured.
- Preserve Your Highlights: Keep the illuminated rims of top petals pure white. The high contrast between crisp white paper highlights and deep velvety shadows is what gives botanical drawings that breathtaking luminous glow.
- Practice with Real Specimens: Whenever possible, place a fresh garden rose or supermarket bloom on your desk. Observing how light filters through translucent petals will inspire your pencil work like nothing else!
Happy sketching! Be sure to save your favorite pins below and share your completed rose drawings with the CraftyTalks community on Pinterest!